1.
Registering your device
There are two different ways you can register your device to Tap on Mobile iOS:
- Automatic Registration (Register via app): This approach will allow you to register your device and have a Terminal ID (TID) automatically assigned.
- If you follow this approach, the device will select any available Terminal ID from the pool of Terminal IDs that are allocated to you.
- If you follow this approach, you will need your Tap on Mobile portal login credentials (email address and password). Please note, a welcome email would have been sent to your registered email address with instructions on how to set this up.
- Manual Registration (Register via online portal): This approach will allow you to register your device and manually assign a Terminal ID.
- If you follow this approach, you will be able to select a specific Terminal ID to allocate to your device.
- If you follow this approach, you will need to be able to access your Tap on Mobile online portal so you can manually register and assign a Terminal ID to your device. Please note, a welcome email would have been sent to your registered email address with instructions on how to set this up.
Details are below:
❯1.
Download the app on the App Store:


2. Open the app
❯3.
Read and accept the terms of the user
agreement:
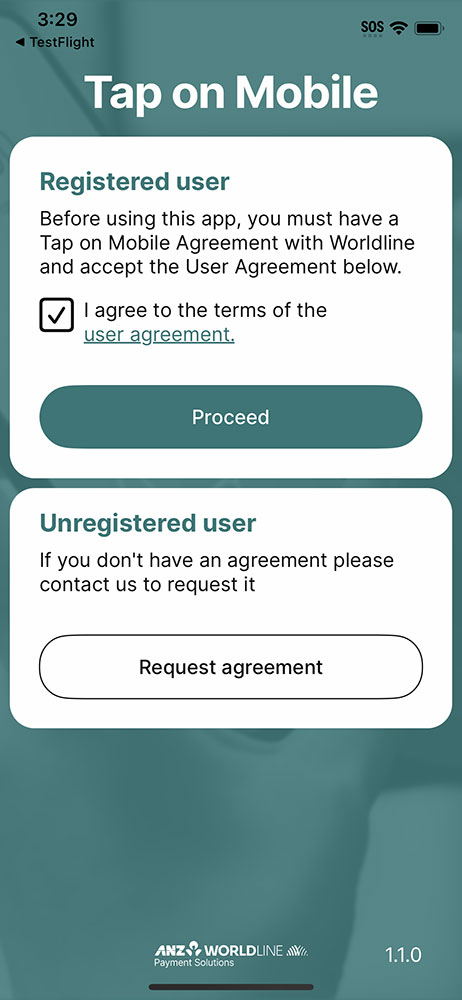
4. Click on “Proceed”
❯5.
The app will provide you with two options to setup your device:
- Register via app
- Register via online portal
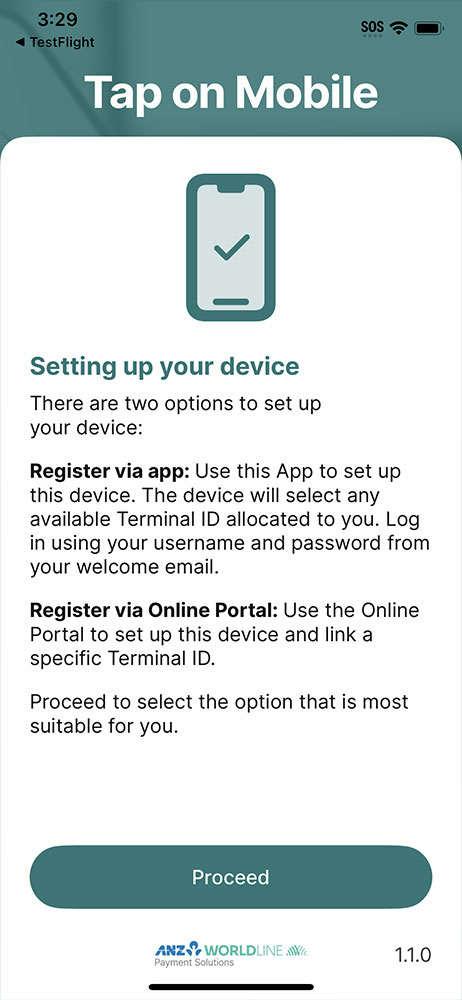
6. Select the most appropriate way to you.
1.1.
Registering via app
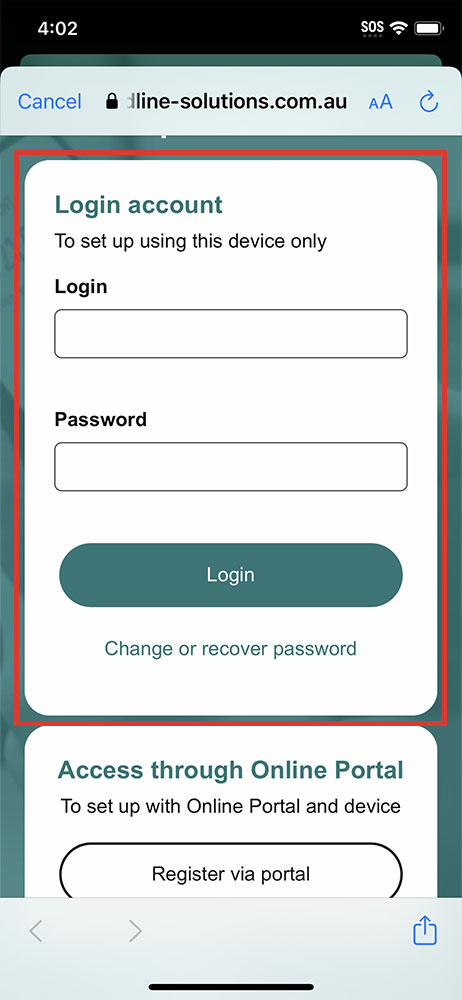
1.
Fill in the information required under 'Login Account'.
2.
Enter the email address that was registered with us as your Login.
3.
Enter your password in the password section.
❯4.
Click on 'Login':
❯5.
The App will randomly select a TID from the pool of TIDs allocated to you and display it in the app:
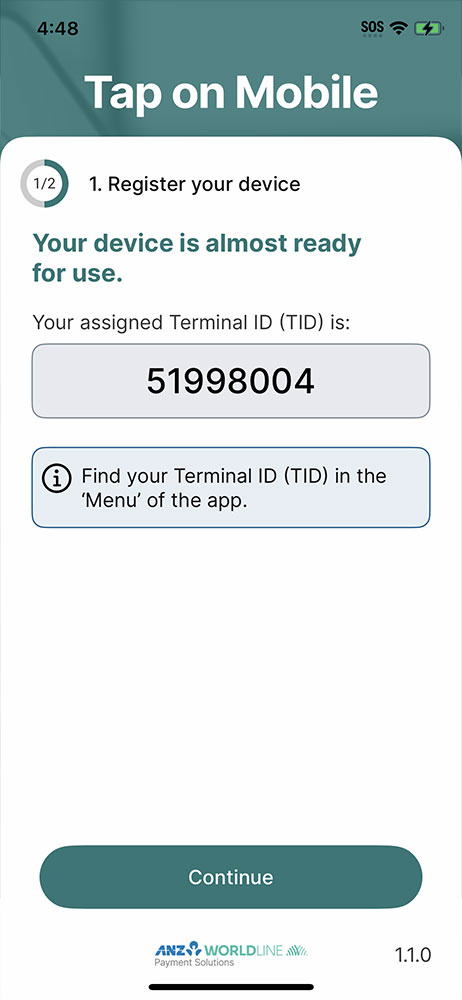
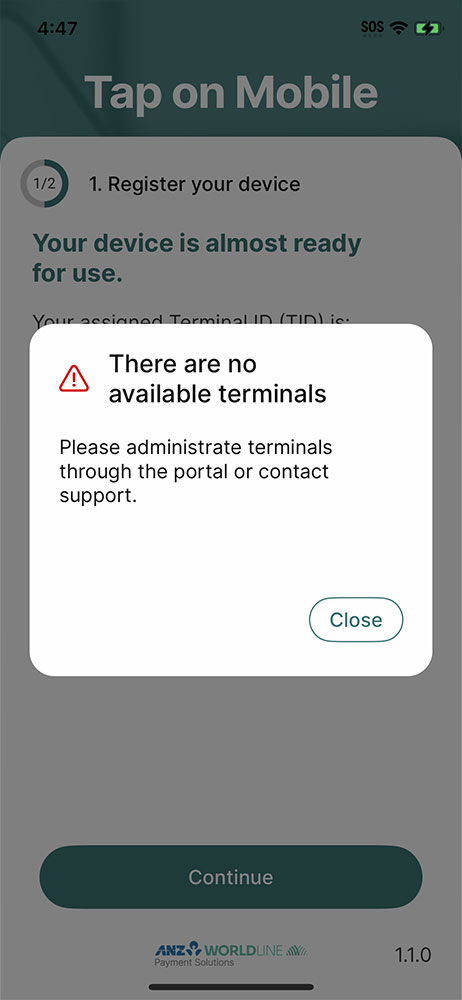
❯6.
If you have run out of TIDs, the app will inform you that 'there are no available terminals'. In this scenario you can either contact us for additional TIDs, or use the your Tap on Mobile online portal to unregister a TID, then re-assign it.
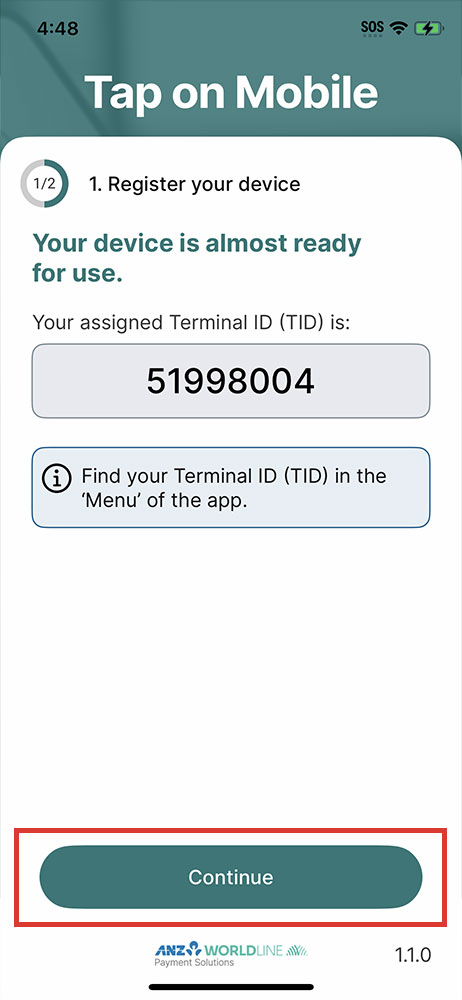
❯7.
Once a TID has been assigned successfully,click on 'Continue'
1.2.
Registering via online portal
Please note, you will need your Tap on Mobile app and access to the Online Portal to register with this method
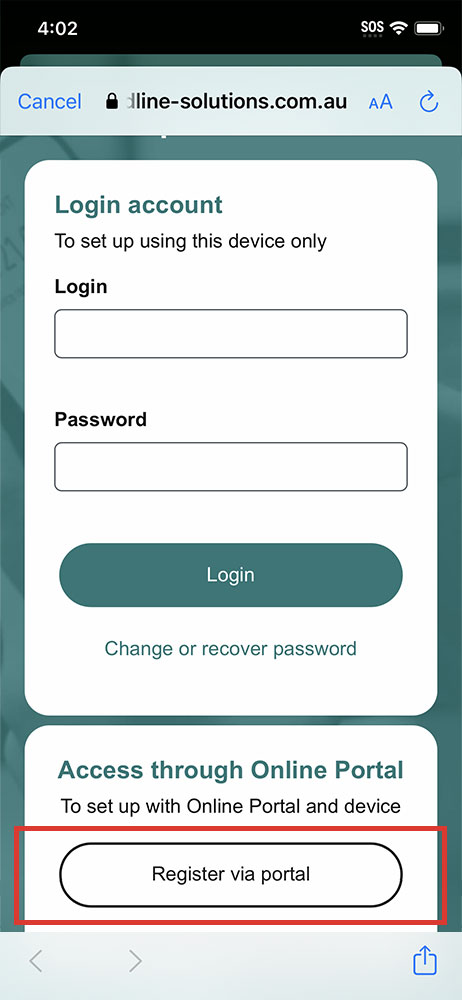
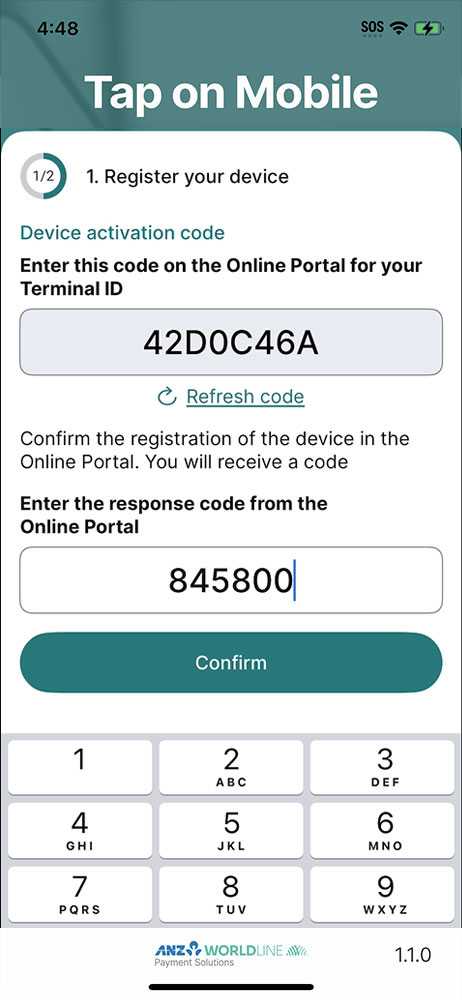
❯1.
Click on 'Register via portal'.
❯2.
Copy the one-time code that is displayed in your Tap on Mobile app:
3.
Log in to the Tap on Mobile Online Portal with your email address and password.
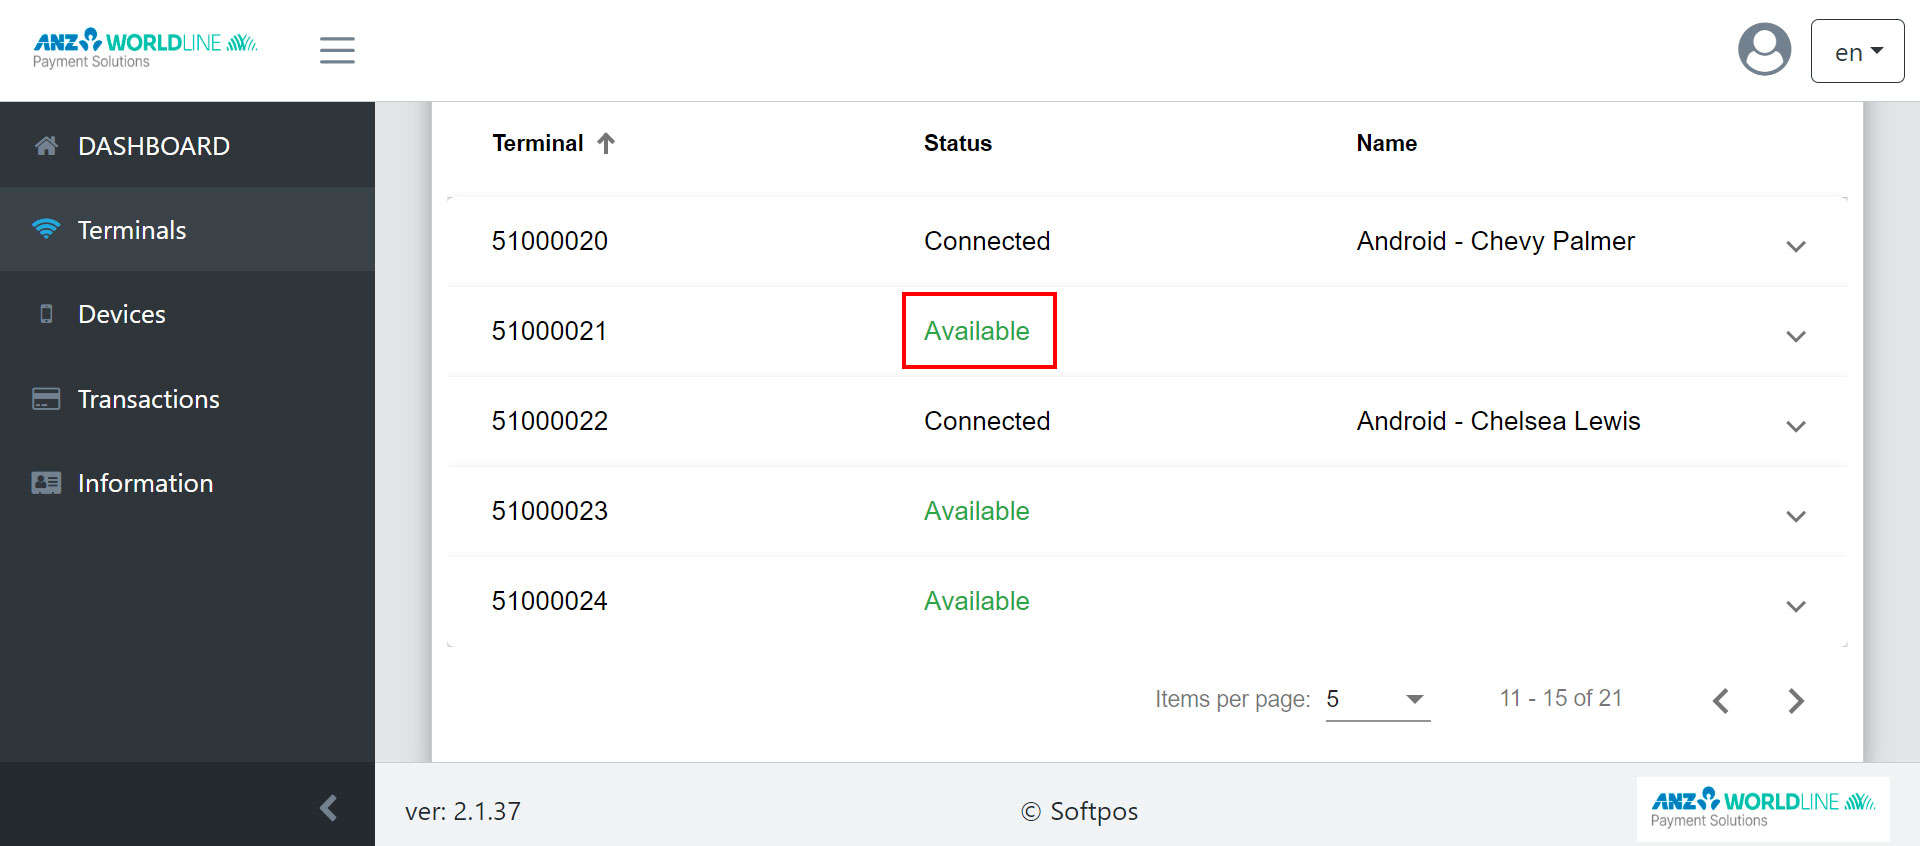
❯4.
Select “Terminals”, choose a terminal with
status “Available” and click the arrow “˅”:
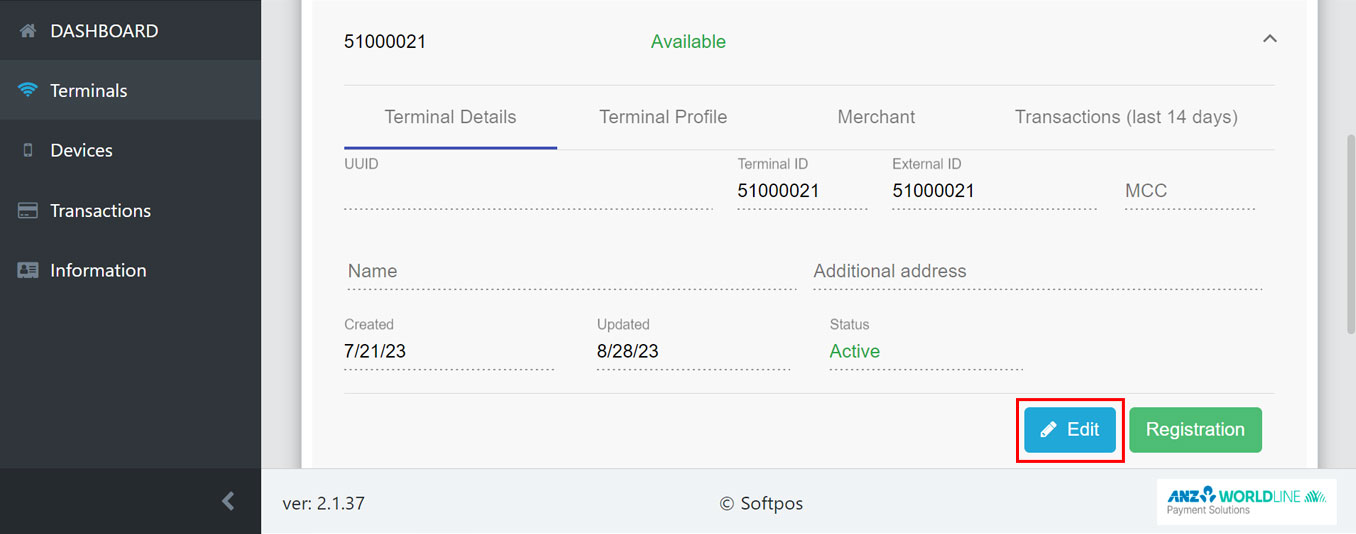
❯5.
Select Edit:
❯6.
Add a "Name" for your user/device:
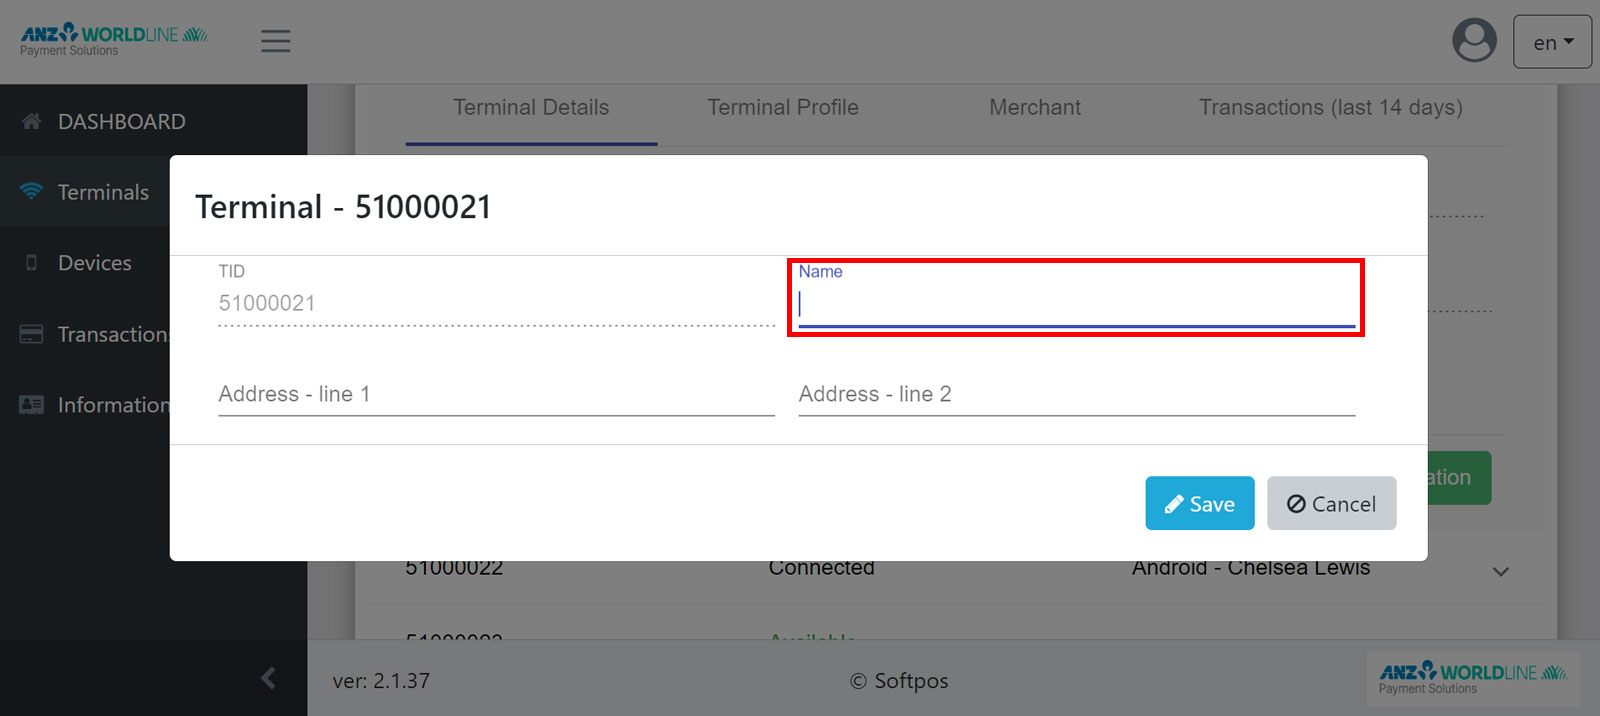
Note: It is recommended that you add the users name and device type e.g. Android or iOS, This will make it easier for you to search and manage your devices/users.
e.g. Name: Android - John ABC, or iOS
- John ABC, etc
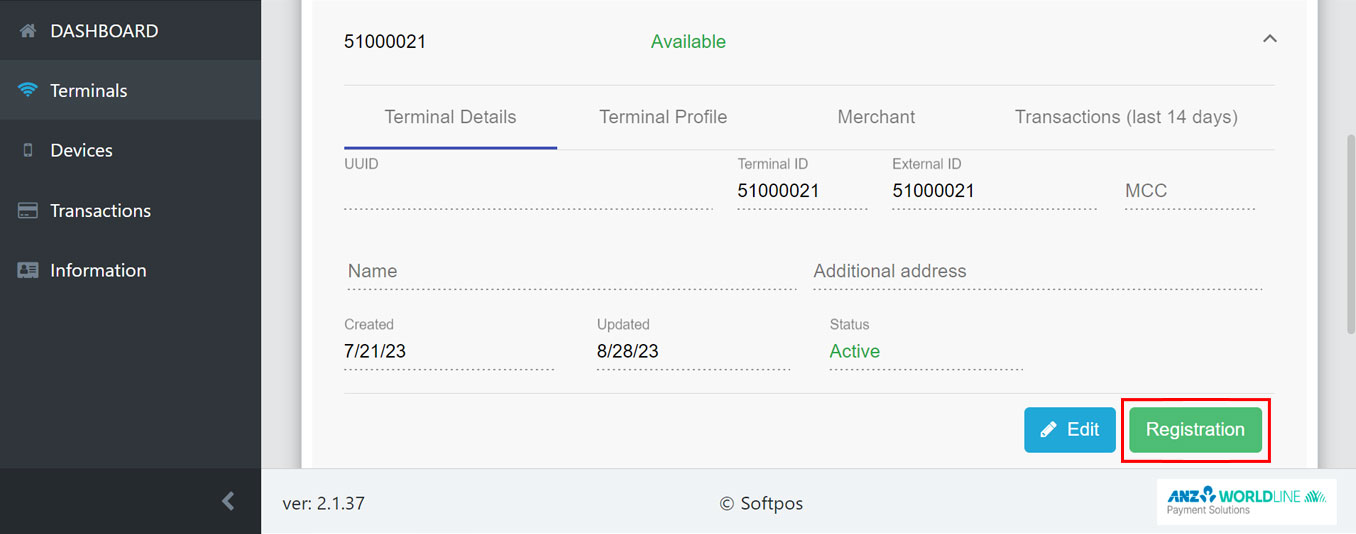
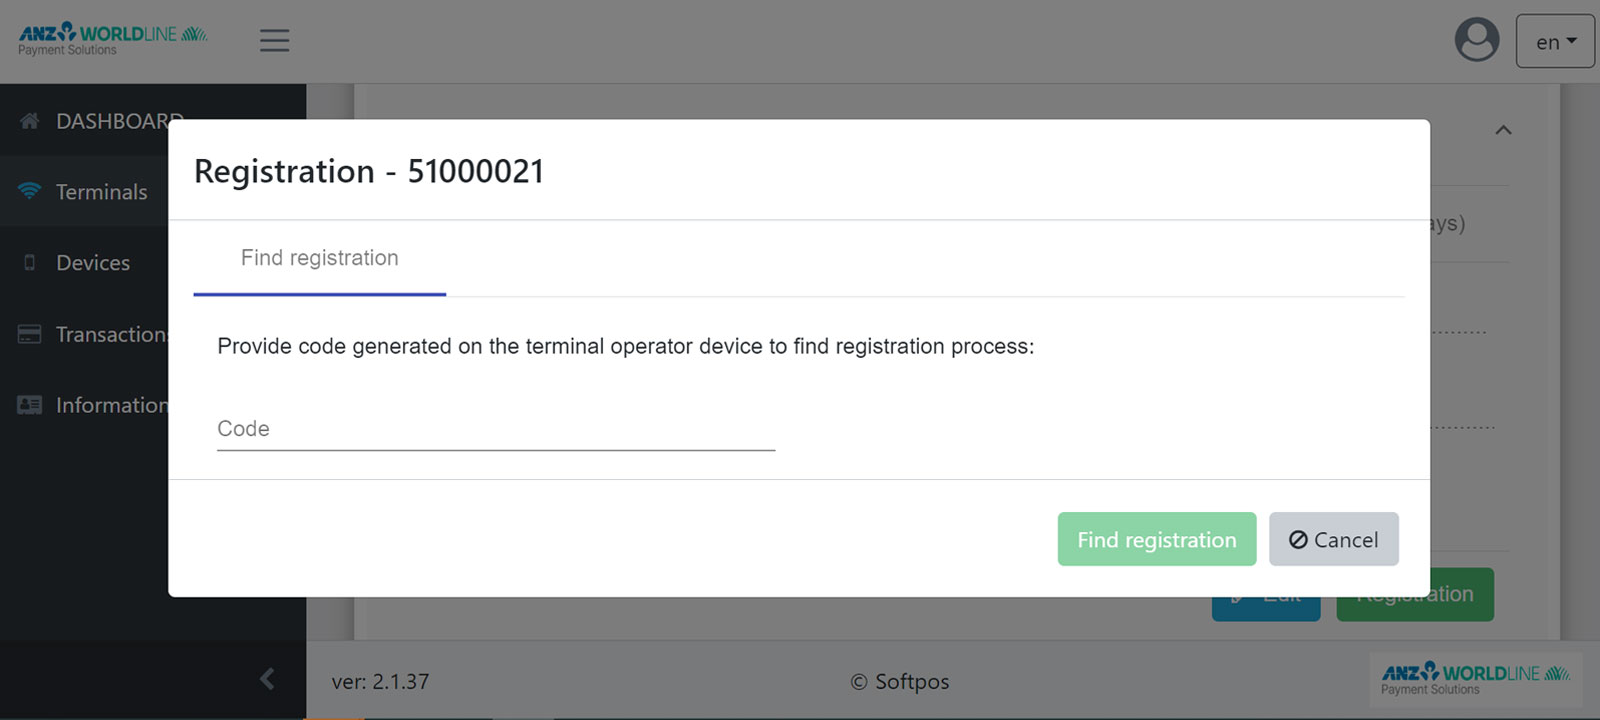
❯7.
Select "Registration":
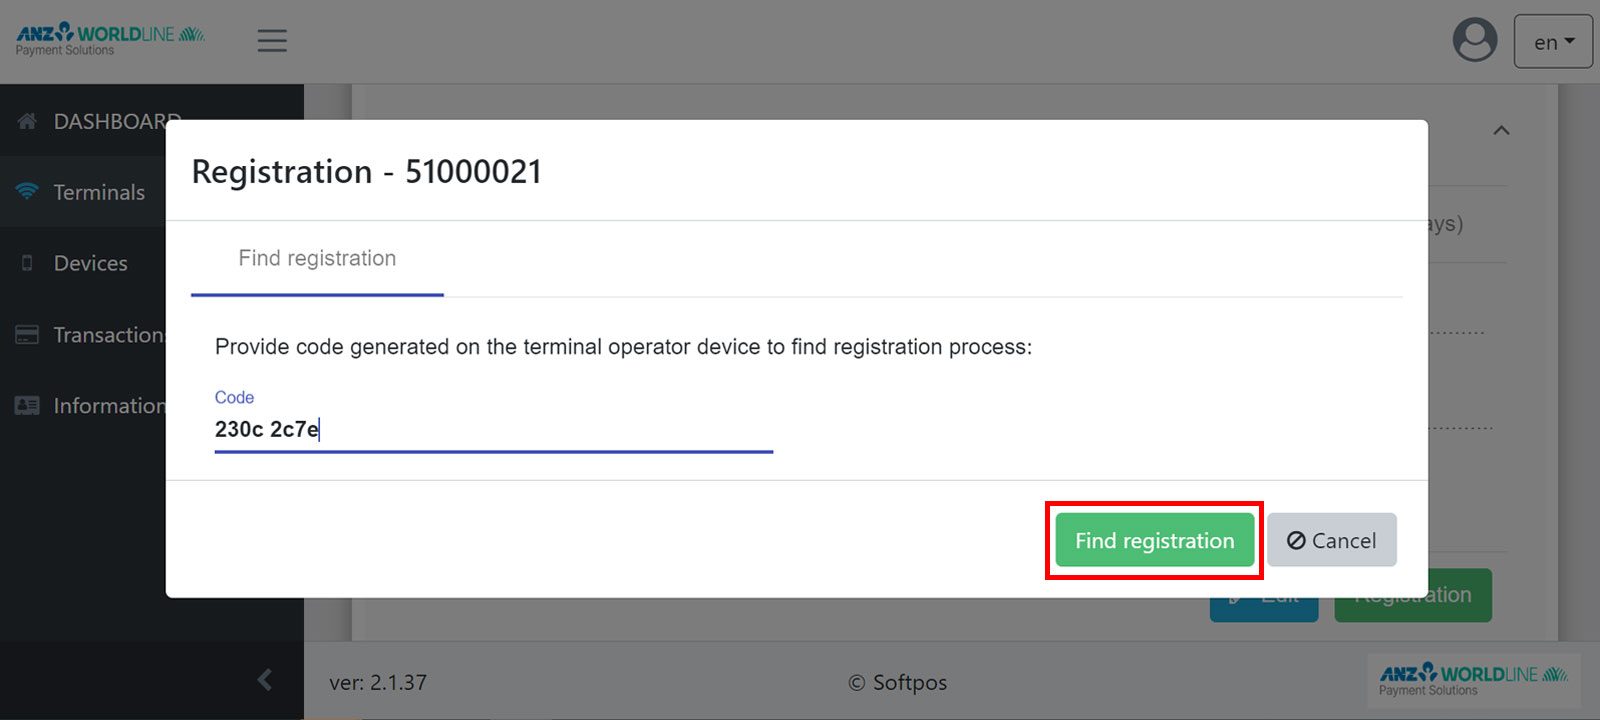
❯8.
Enter the one-time code from your Tap on Mobile
app and select "Find registration":
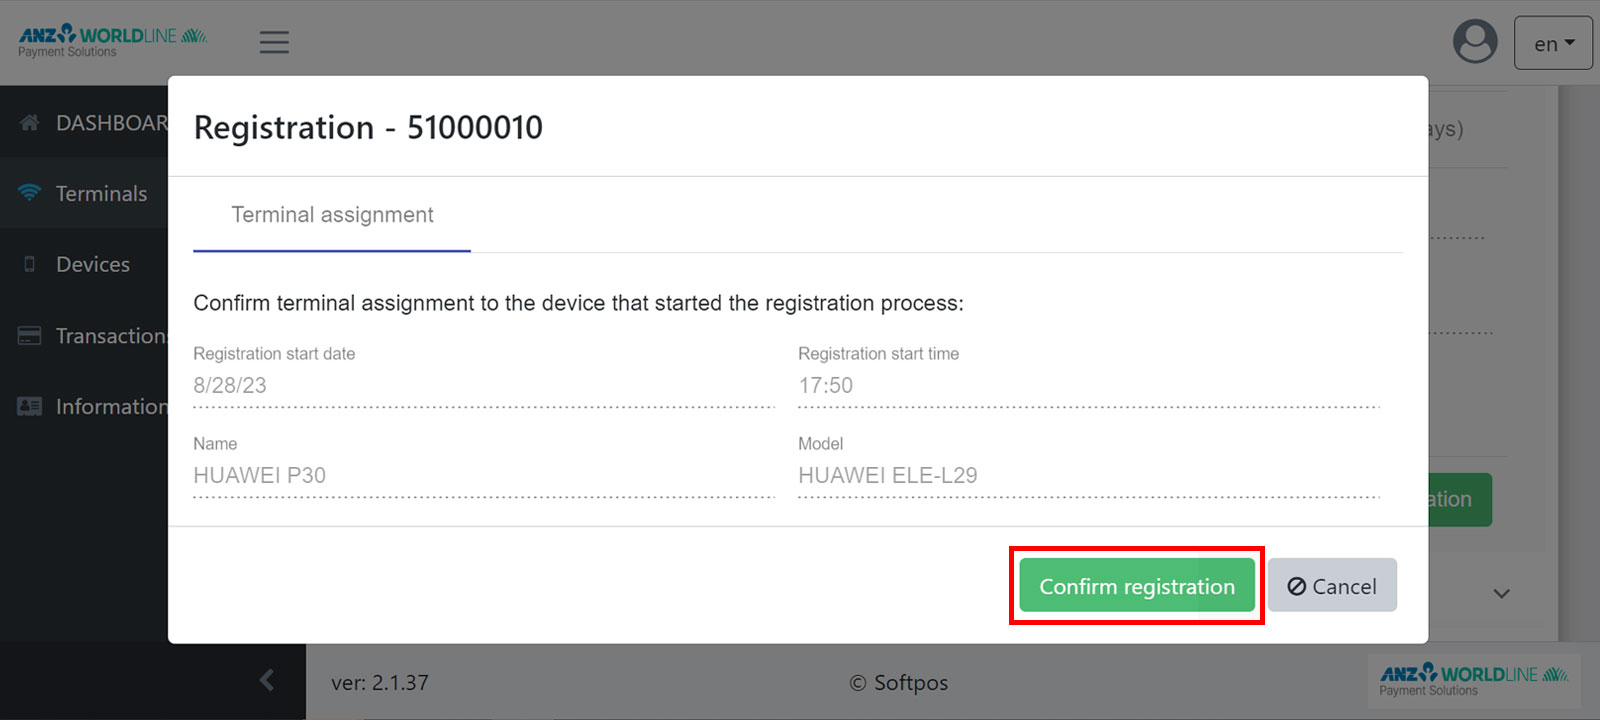
❯9.
Confirm the registration:
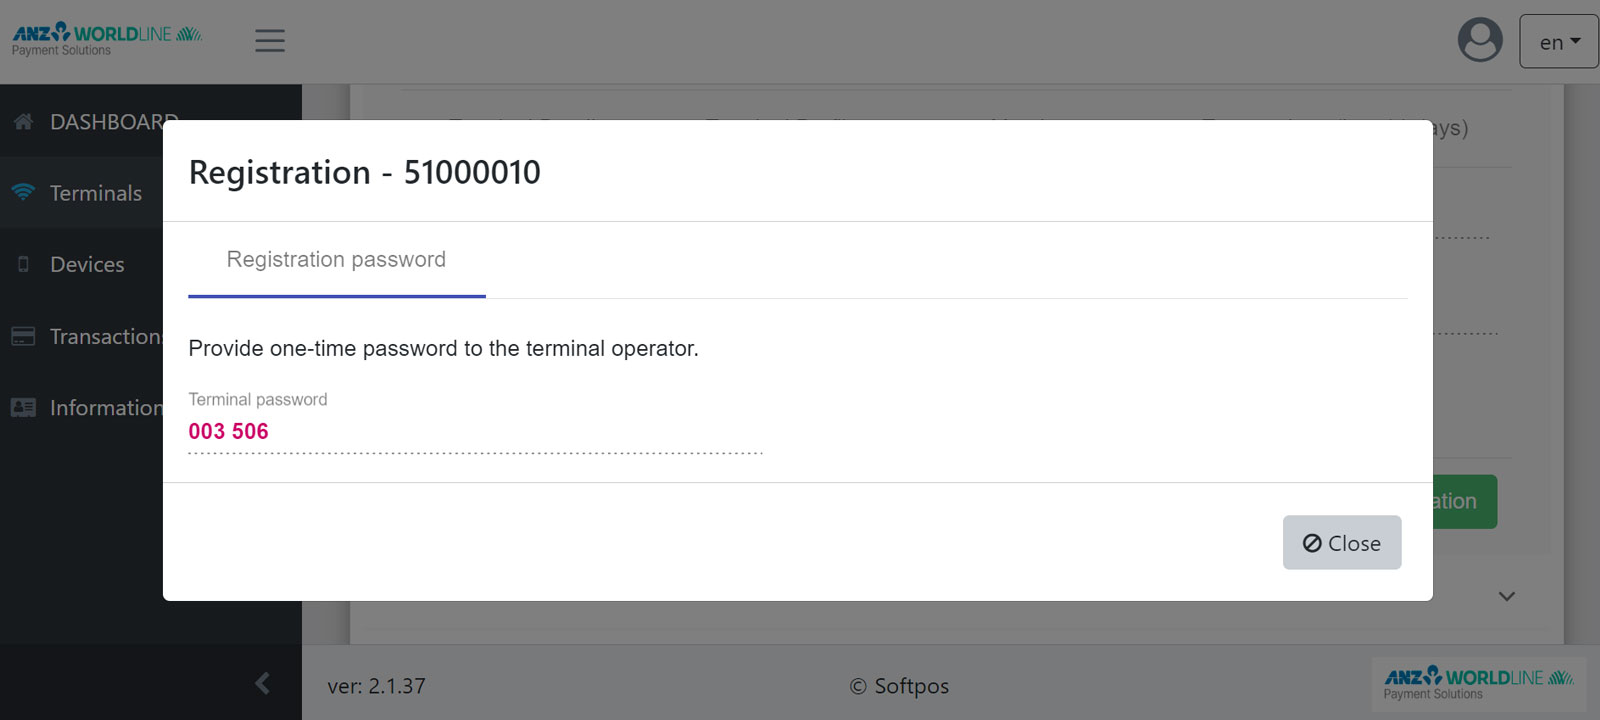
❯10.
A one-time password is displayed. Enter this
password in your Tap on Mobile app to complete your registration, and click “Confirm”:
2.
Finishing the setup of your Tap on Mobile device
Finish the App setup by setting a PIN to access the app.
❯1.
Set a device log in code for your Tap on Mobile
app, then enter:
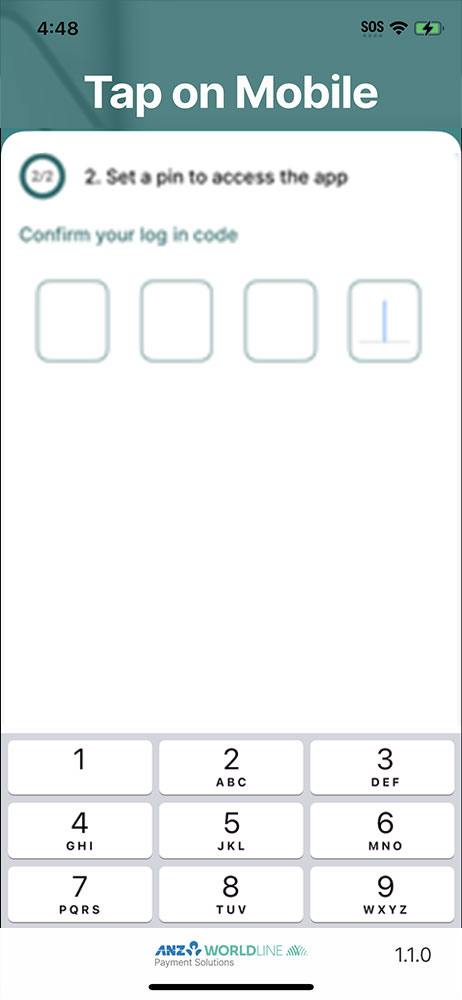
2.
Confirm by re-entering the same code again.
❯3.
Congratulations, you have successfully registered your device
and ready to use it:

3.
Adding a device/user
Your Tap on Mobile contract will state the number of TIDs assigned to your account. To link an available TID to an additional device, follow the steps illustrated above.
4.
Unregister a device
Occasionally, you might need to remove or uninstall the app from a certain mobile device and install it on another. In that case, you can follow either of these methods:
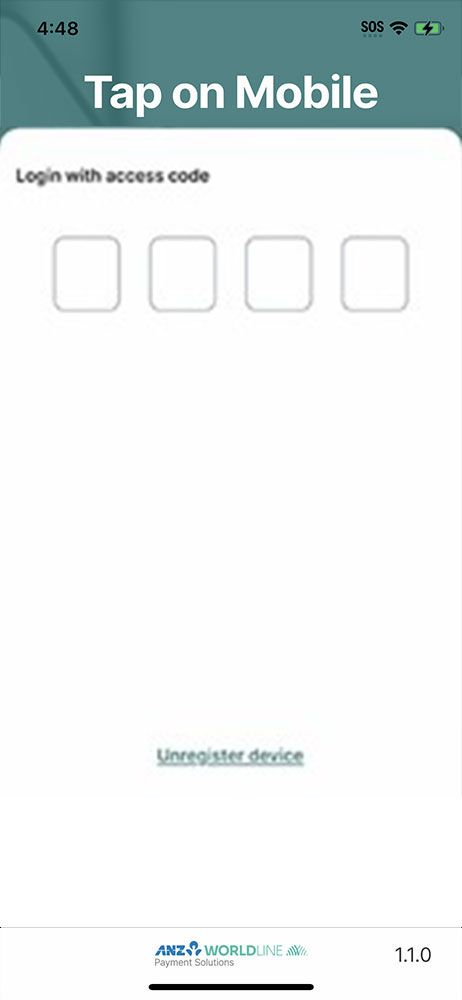
From the mobile device:
1.
Open the app on the device you want to uninstall the app from.
❯2.
On the login screen, select “Unregister
device”:
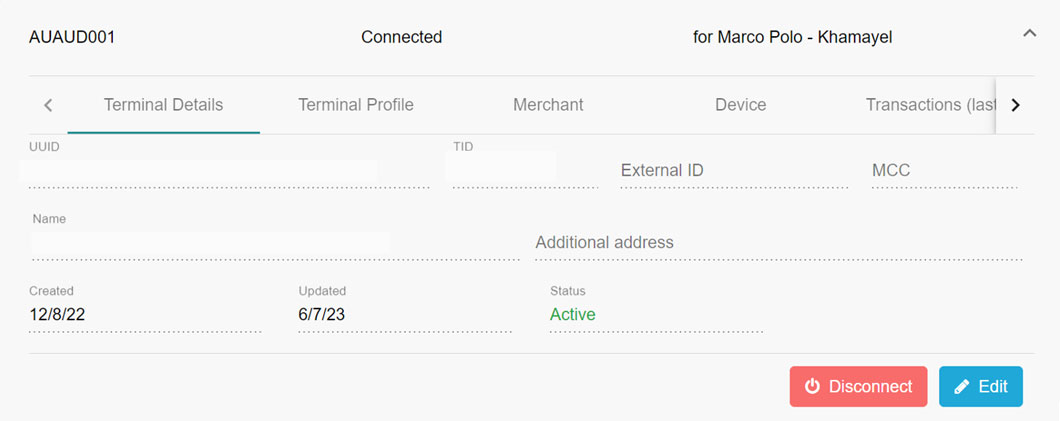
From the Online Portal:
1.
Go to the 'Terminals' tab in the Tap on Mobile Online Portal.
2.
Select the required terminal, and click the arrow “˅”.
❯3.
Click on “Disconnect”.
6.
Processing a payment
Accepting contactless payments with
Tap On Mobile - Apple.
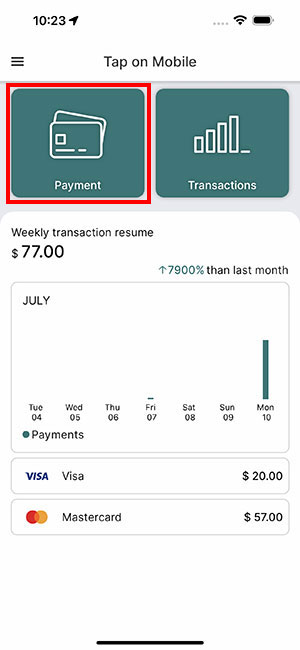
❯1.
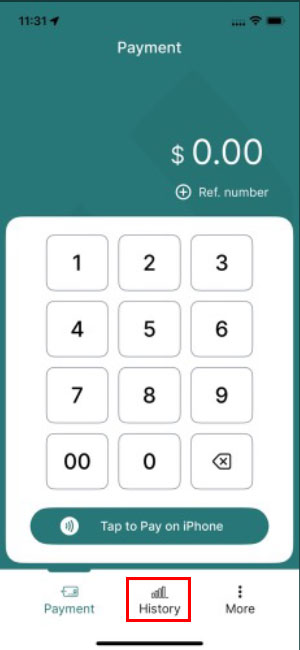
When you first open the app it will take you directly to the payment screen. If you are in another screen in the app you can select 'Payment' in the bottom menu:
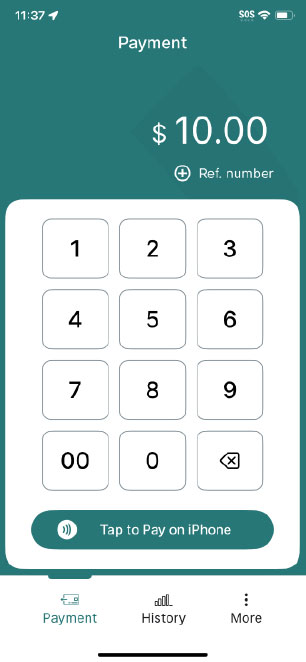
❯2.
Enter the amount and press 'Tap to Pay on iPhone':

3.
Ask the customer to tap their credit or debit card, mobile wallet, or wearable at the top of the device.
❯4.
If prompted, ask customer to enter their PIN:

❯5.
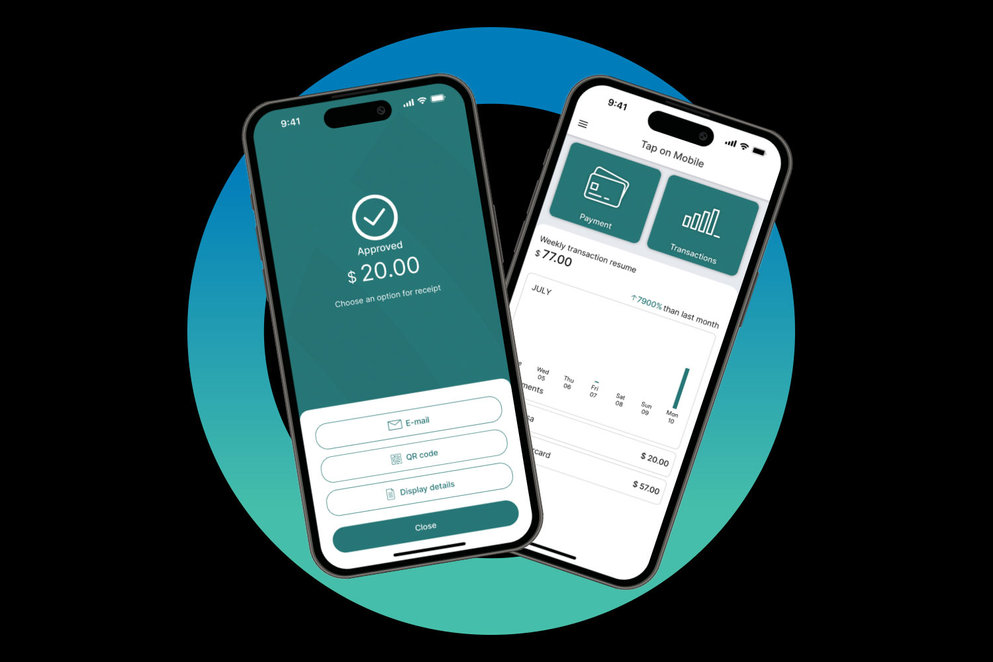
Transaction is completed when the screen says ‘Transaction completed’:
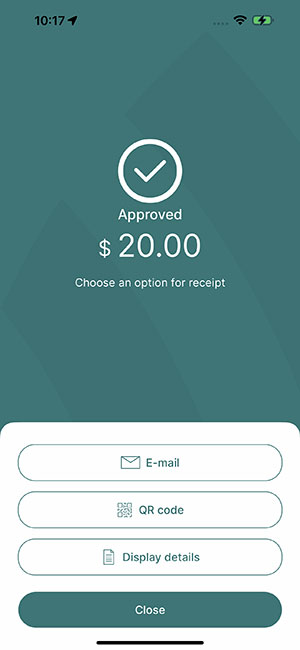
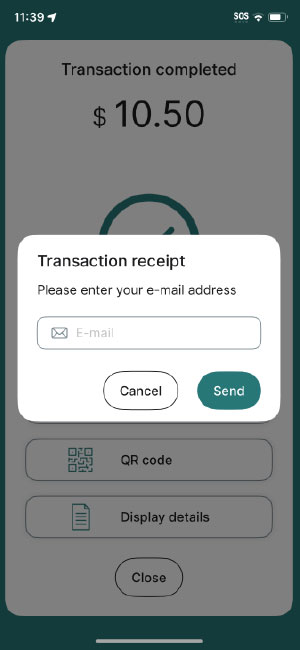
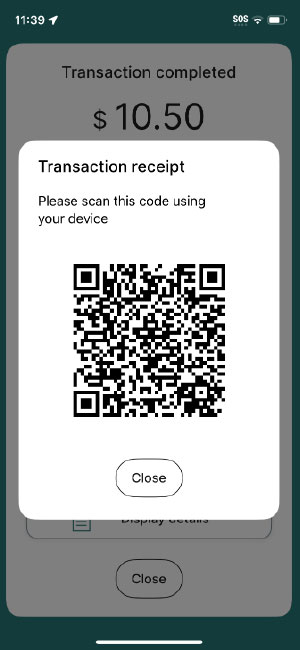
❯6.
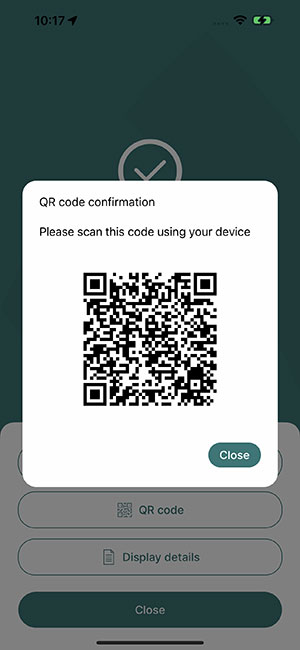
Send a receipt via email or QR code, then select 'Close':

6.
Processing a payment with tipping
Accepting contactless payments with
Tap On Mobile - Apple.
❯1.
When you first open the app it will take you directly to the payment screen. If you are in another screen in the app you can select 'Payment' in the bottom menu:
❯2.
Enter the amount and press 'Tap to Pay on iPhone':
❯3.
Ask the customer if they'd like to leave a Tip. If they want to, they can select one of the preset percentages (5%, 10% or 15%) or choose to leave a custom amount:
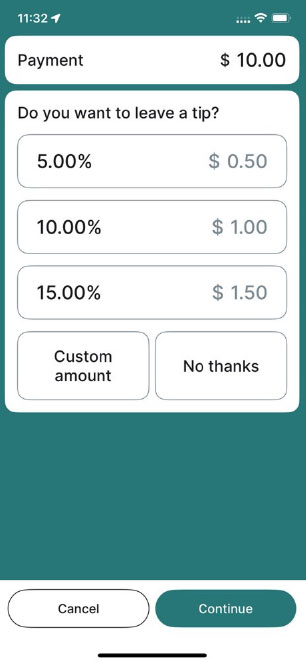
❯4.
If the customer doesn't wish to leave a tip, select 'No thanks':
❯5.
Ask the customer to tap their credit or debit card, mobile wallet, or wearable at the top of the device:
❯6.
If prompted, ask customer to enter their PIN:
❯7.
Transaction is completed when the screen says 'Approved':
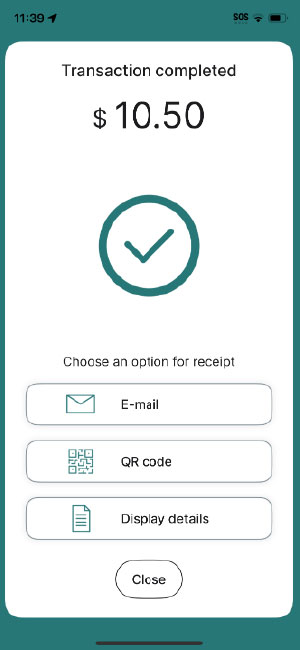
❯8.
Send a receipt via email or QR code, then select 'Close':
7.
Processing a refund
7.1 Reversing Payments with Tap On Mobile
- Apple.
A reversal allows you to refund a transaction back to the same card that was used without needing to have the card present. Please note, you can only reverse the last transaction that was processed. If you want to reverse a transaction prior to the last one processed then you will need to process a refund.
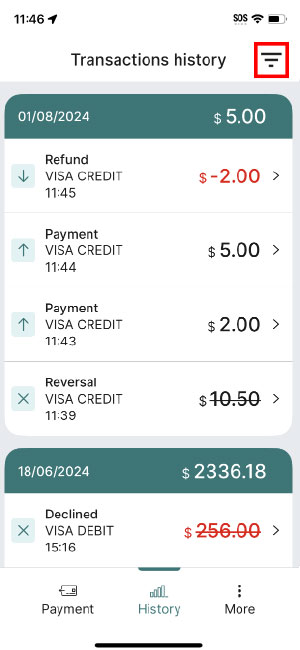
❯1.
Select 'History' to bring up a list of your processed transactions:
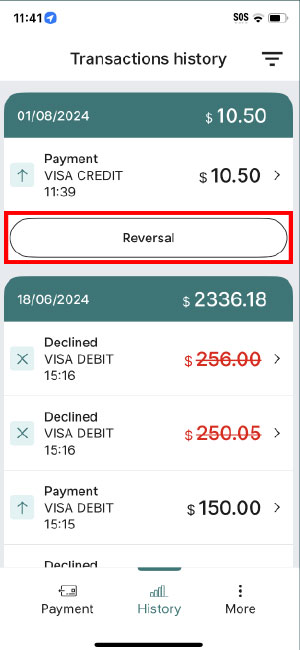
2.
From the Transactions list, go to the last transaction. Be sure to check that you've got the correct transaction as once it has been reversed, you will not be able to change your mind.
❯3.
Tap on 'Reversal':
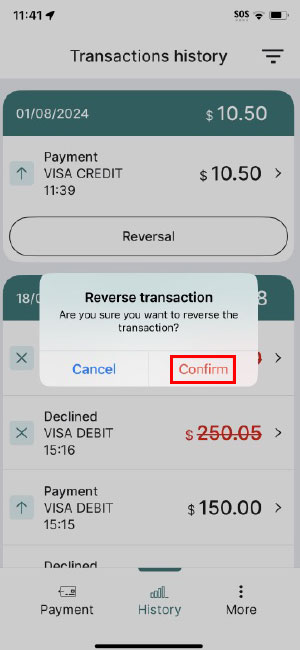
❯4.
When prompted to confirm your selection, select
'Confirm':
6.
The transaction will be reversed.
❯6.
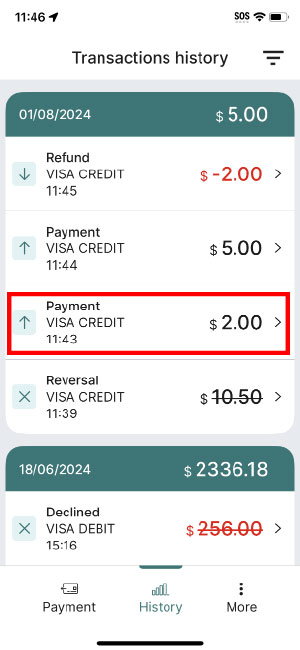
In the transactions list, the reversed transaction will be shown with a strikethrough:
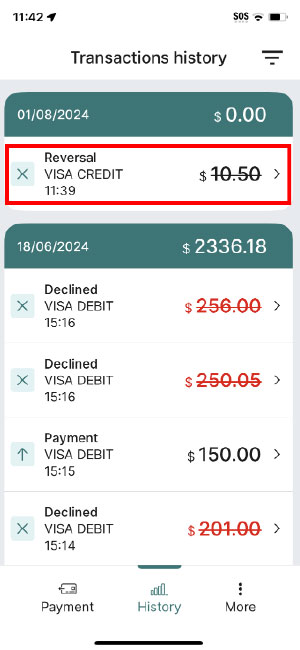
7.
You can send the updated receipt via email or QR code, then close.
7.
Processing a refund
7.2 Refunding Payments with Tap On Mobile - Apple.
❯1.
Select 'History' to bring up a list of your processed transactions:
❯2.
The transaction list contains all of your transactions processed in the last 6 months. From the transactions list, find the transaction you need to refund by either looking for it from the available list, or by using the 'Transaction filters'. Be sure to check that you've got the correct transaction as once it has been refunded, you will not be able to change your mind:
OR
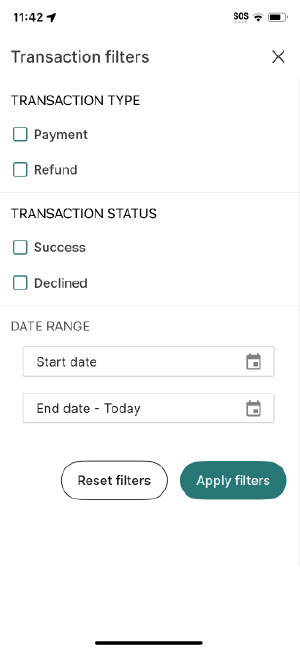
Be sure to check that
you've got the correct transactions. Once refunded, you will not be able to change your mind.
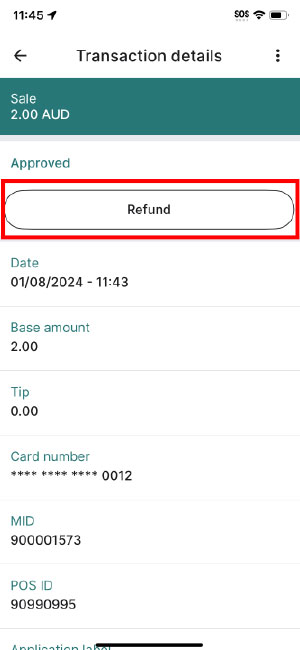
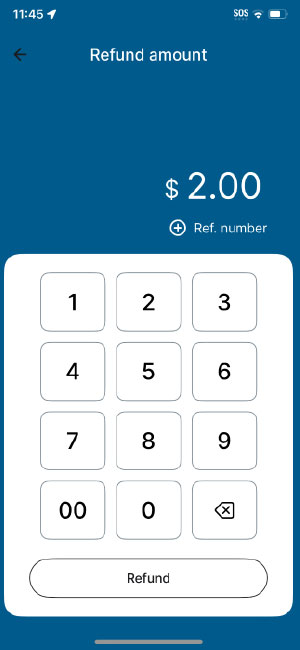
❯3.
Once the required transaction is selected, tap on 'Refund':
❯4.
Ask the customer to tap the same credit or debit card, mobile wallet or wearable that was used to perform the purchase at the top of the device:

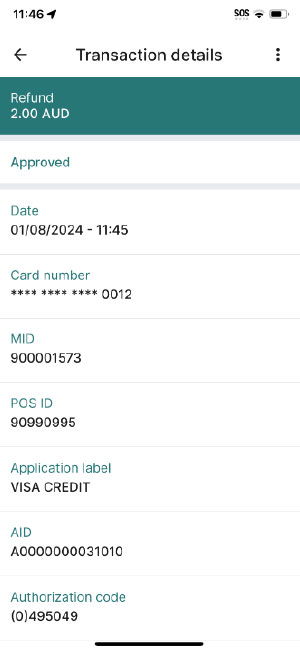
❯5.
The transaction will be refunded:
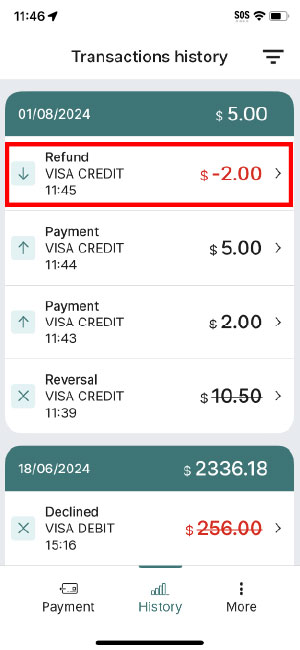
❯6.
In the Transactions list, the refunded transaction will be shown in red:
8.
You can send the updated receipt via email or QR code, then close.
8.
Glossary
Transaction Type + Status combination on the
Online Portal:
- Sale + Cleared: i.e., Purchase/Sale process was accepted and completed.
- Sale + Cancelled: i.e., Purchase/Sale process was reversed or cancelled.
- Sale + Declined: i.e., Purchase/Sale process was declined by customer before completion.
- Sale + Refunded: i.e., Purchase/Sale transaction was refunded.
- Refund + Authorised: i.e., the refund process was authorised and completed.
9.
Important Notes
Transaction Type + Status combination on the
Online Portal:
- If you mistakenly performed a partial refund, you will not be able to go back to the same transaction to perform additional refund(s), instead contact Merchant Services Support on 1800 039 025 for assistance.
- The transactions will appear on the Online Portal and Merchant Portal in “near real-time”, if you still cannot see a transaction on either, please refresh the page and it should appear.
- The Tap on Mobile App graph will only display transaction data for up to 1 week.
- The Online Portal will only display transaction data for up to 1 month.
- For older transactions, please refer to your Merchant Portal, which holds information for up to 24 months.
- Please note temporary disruptions and outages for system maintenance may apply to the Online Portal.
- Limits apply to any of your customers that are using the following physical cards to complete a sales / purchase transaction:
| Scheme Limit in AUD | |
| Visa Purchase amount | >$200 |
| Mastercard Purchase amount | >$100 |
| EFTPOS Limits | Depends on the card issuing bank |
Your eligible mobile device will require a customer to key
in their card pin for any amount above the limit displayed above.
Please note that if the customer uses their
digital wallet (either phone or watch) then they will not be required to enter any card pin on
your eligible mobile device.
5.
How to enable tipping for your Tap on Mobile app
1.
Log in to the Tap on Mobile Online Portal with your email address and password. https://taponmobile.portal.anzworldline-solutions.com.au/.
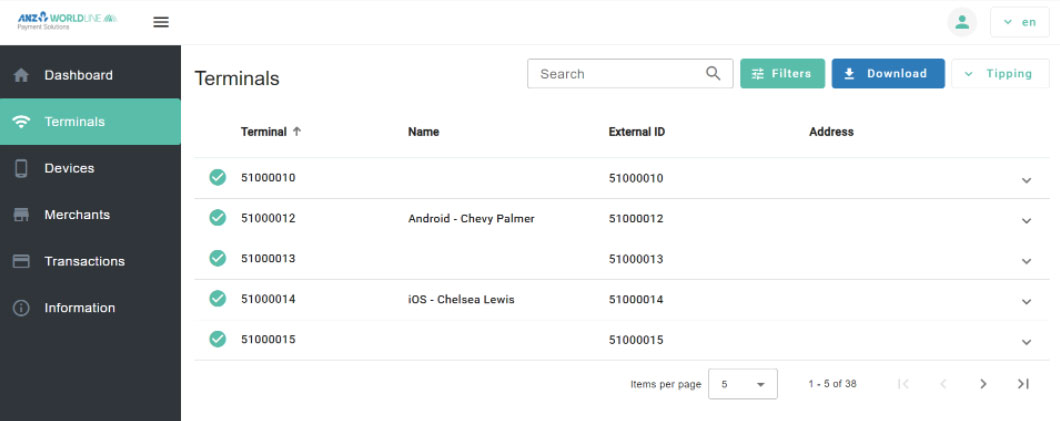
❯2.
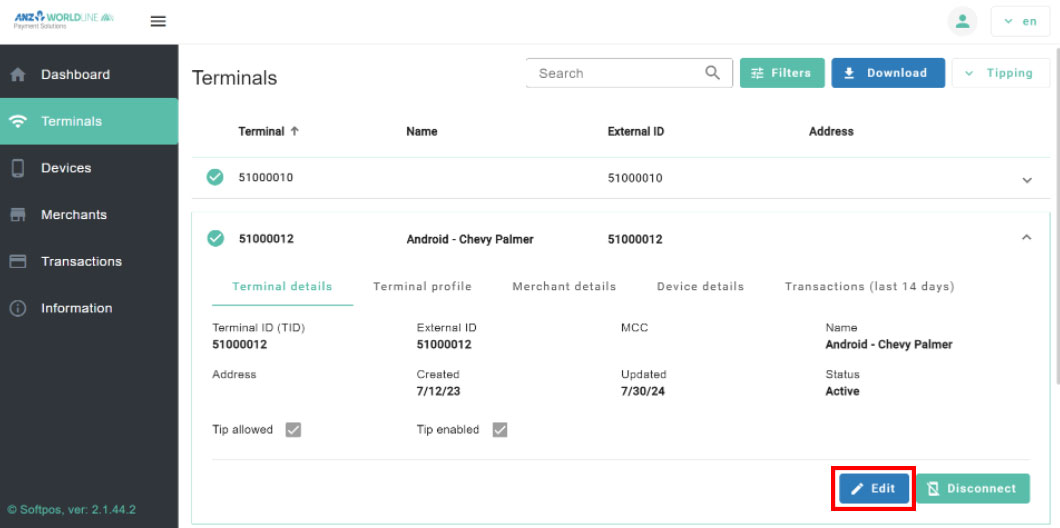
Select ‘Terminals’ and locate the Terminal ID you would like to enable Tipping for and click on the arrow ‘v’:
❯3.
Select 'Edit':
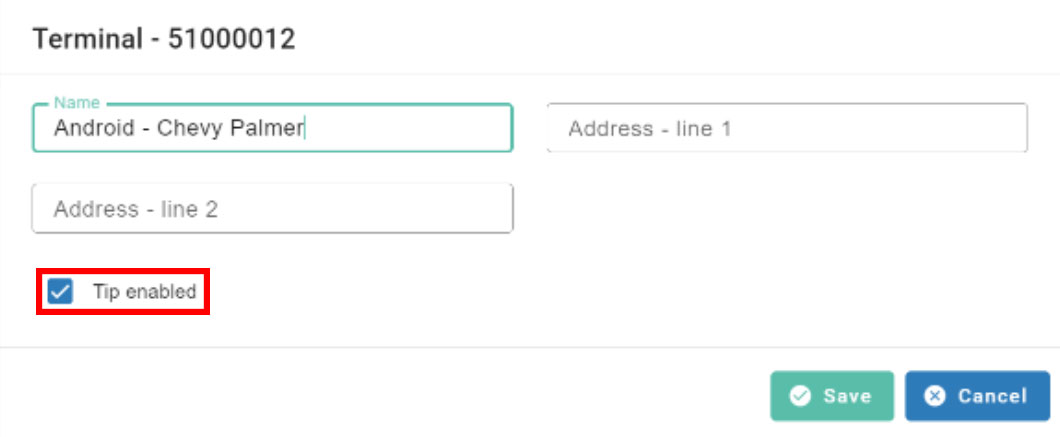
❯4.
Select 'Tip Enabled':
Note: If you do not see the option to select 'Tip enabled' please contact our Merchant Servicing Helpdesk on 1800 039 025 for further assistance.
Note: If you do not see the option to select 'Tip enabled' please contact our Merchant Servicing Helpdesk on 1800 039 025 for further assistance.
❯5.
Select 'Save':
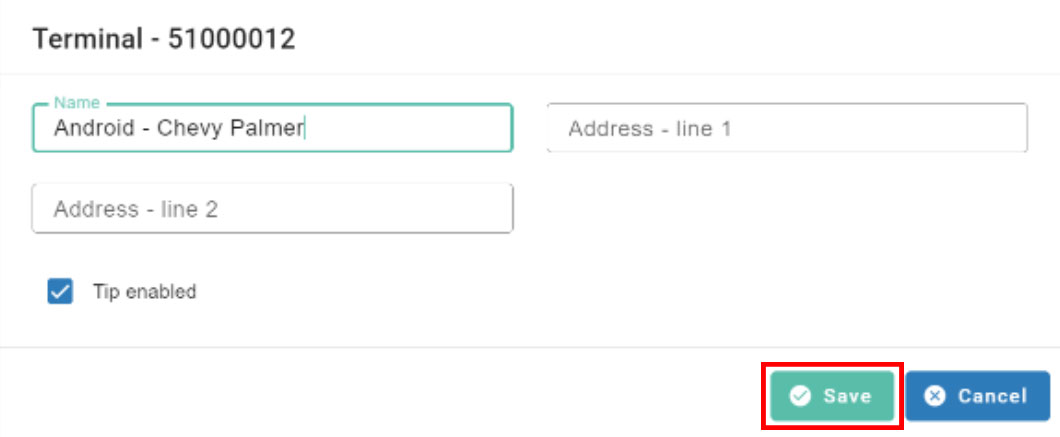
6.
Tipping has now been enabled on your device. Please restart the app for the changes to take effect. If you wish to enable tipping for another TID, follow the same steps above.