1.
Registering via online portal
To use the Worldline Tap on Mobile app, you need to have applied and been approved for a Tap on Mobile Merchant Facility with ANZ Worldline Payment Solutions. Once you've been approved, you'll receive a welcome email from noreply@worldline.com.


Note: You'll use these registration details to
login to the Online Portal and link your Merchant Facility to the Eligible Mobile
Device you've downloaded the Tap on Mobile App on (see step 4).
For your Apple Device to be eligible it has to be an iPhone XS or later, using iOS 16.4 or later, has App Store installed, and Internet access.
2.
Agreeing to use 'Worldline Tap on Mobile' app
When using the Tap on Mobile App ('App'), your device turns into a device for you to receive payments on. Consequently, during installation, our App will:
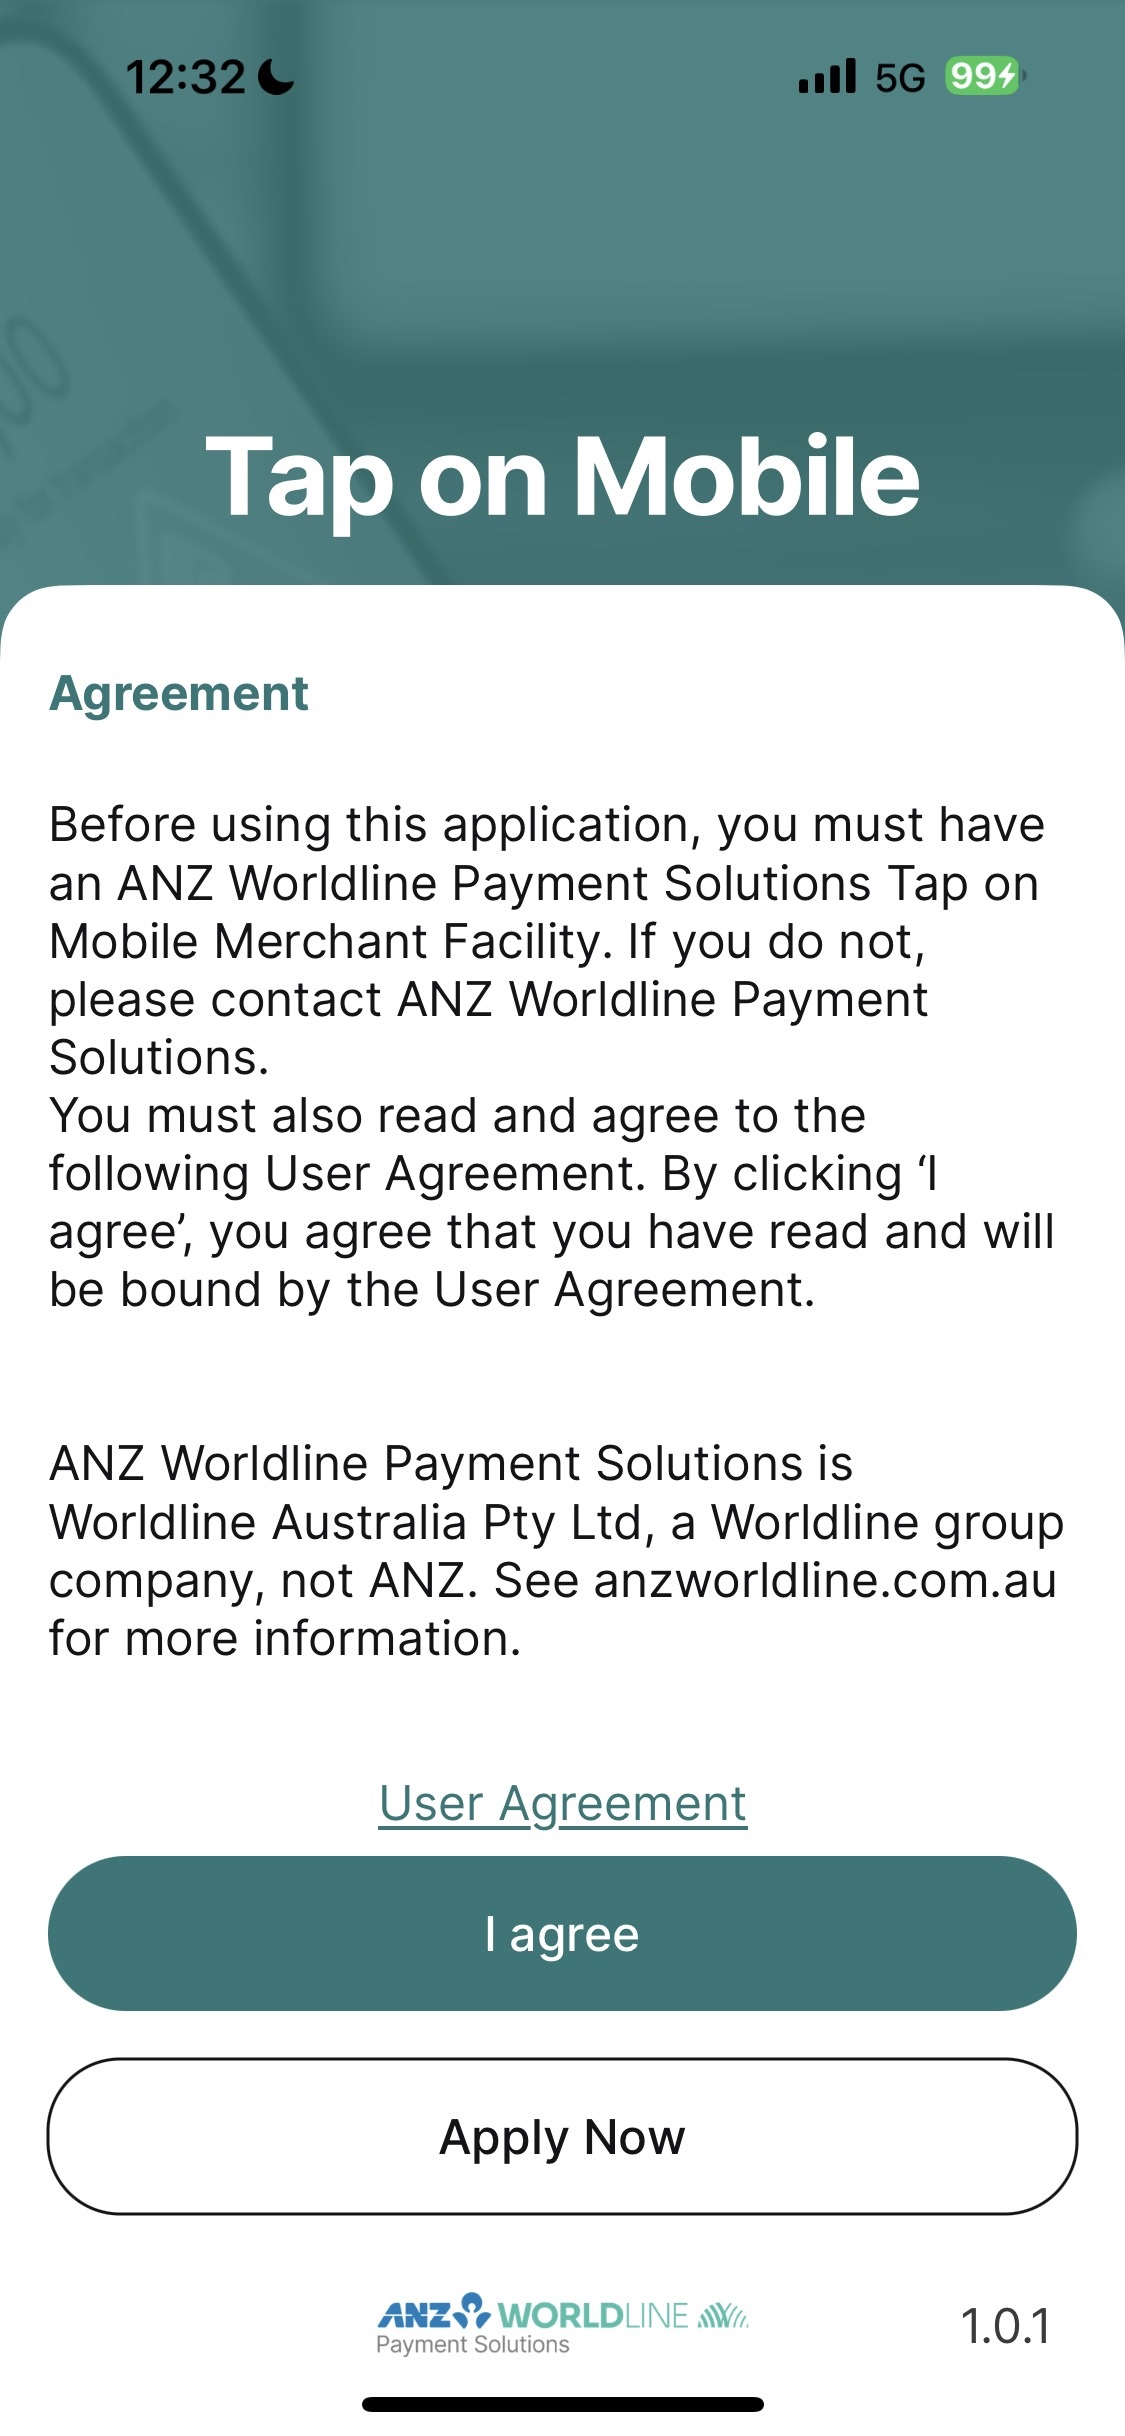
- Ask you for your consent to use the App by agreeing to the 'User Agreement'.
- Ask you for special permissions and consents that are necessary to secure the transaction process according to the requirements created and verified by the payment schemes and PCI SSC (Payment Card Industry Security Standards Council).
It's your choice whether you choose to agree to the 'User Agreement' and grant the permissions, but if you don't you will not be able to use the Tap on Mobile App.
3.
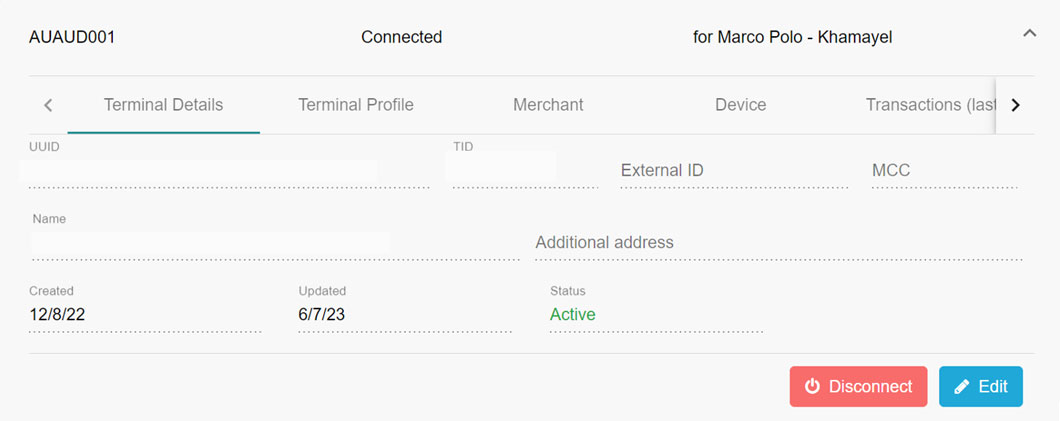
Registering your device
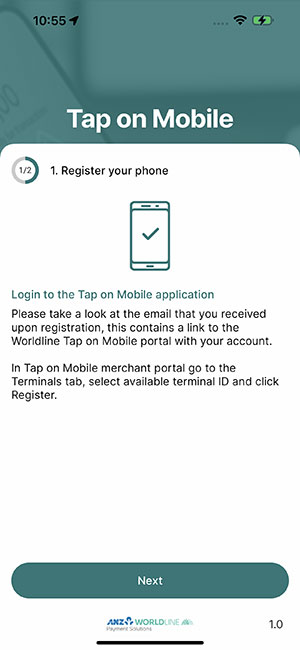
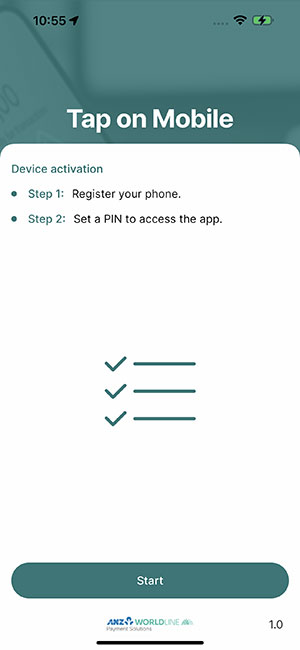
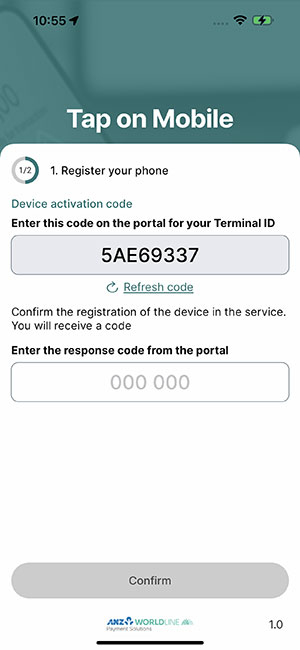
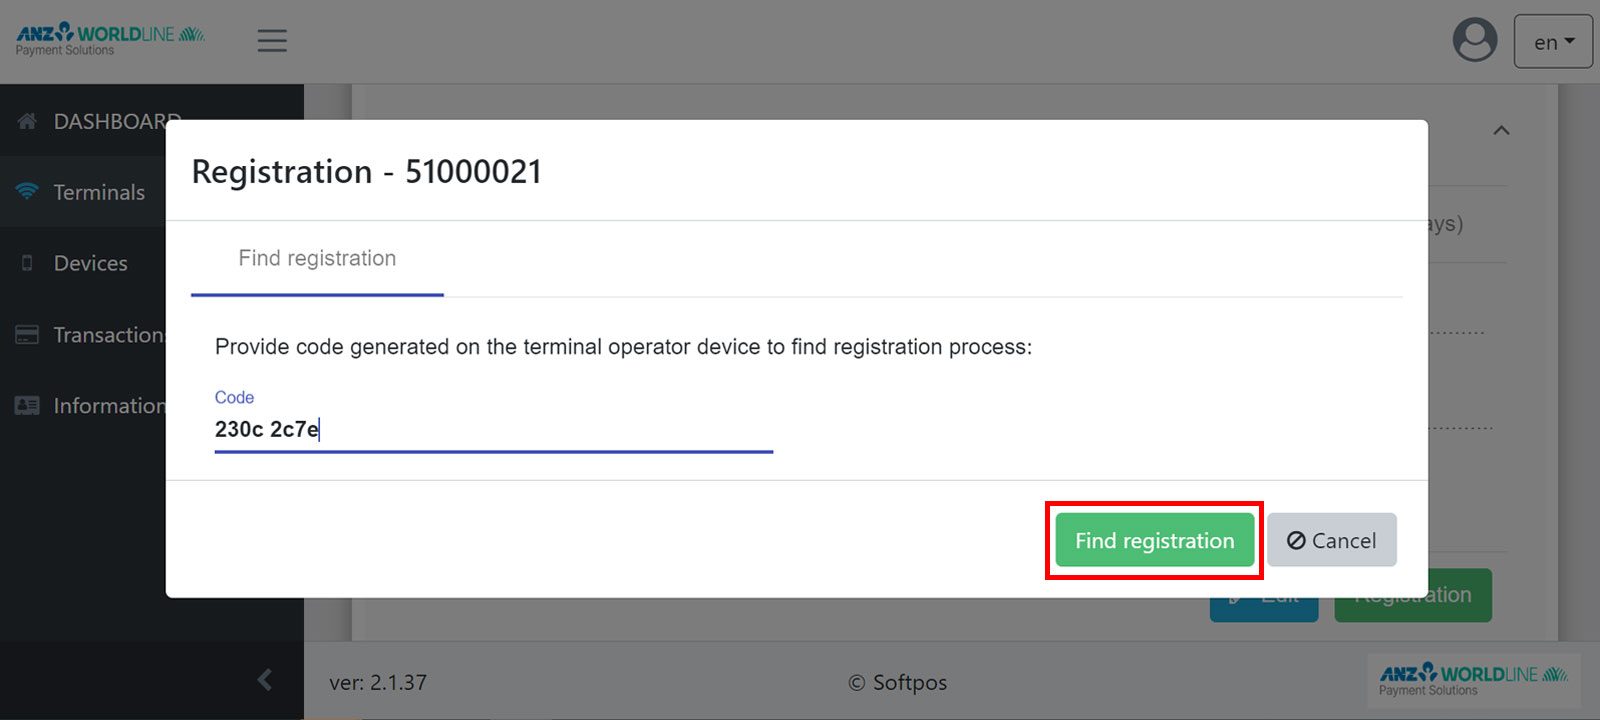
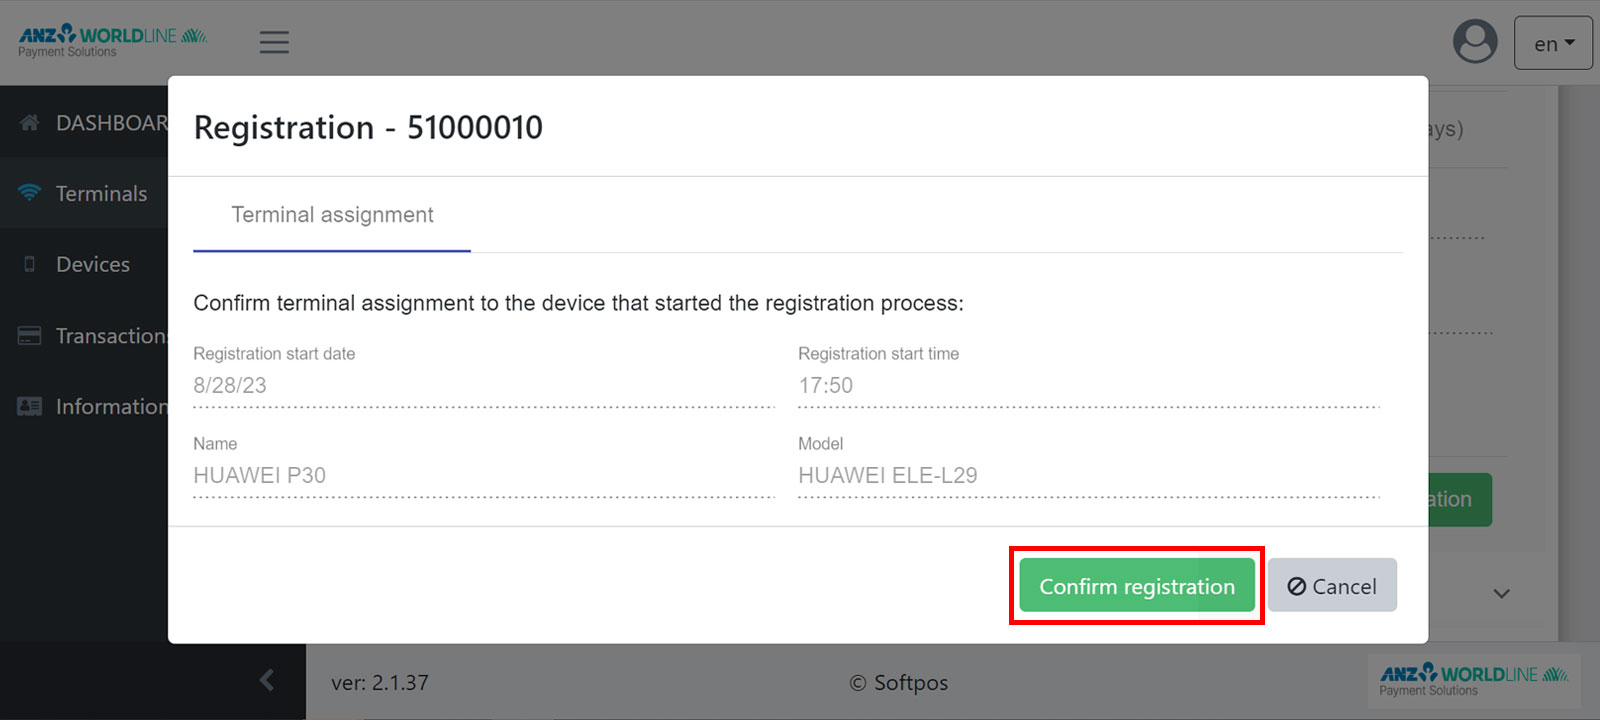
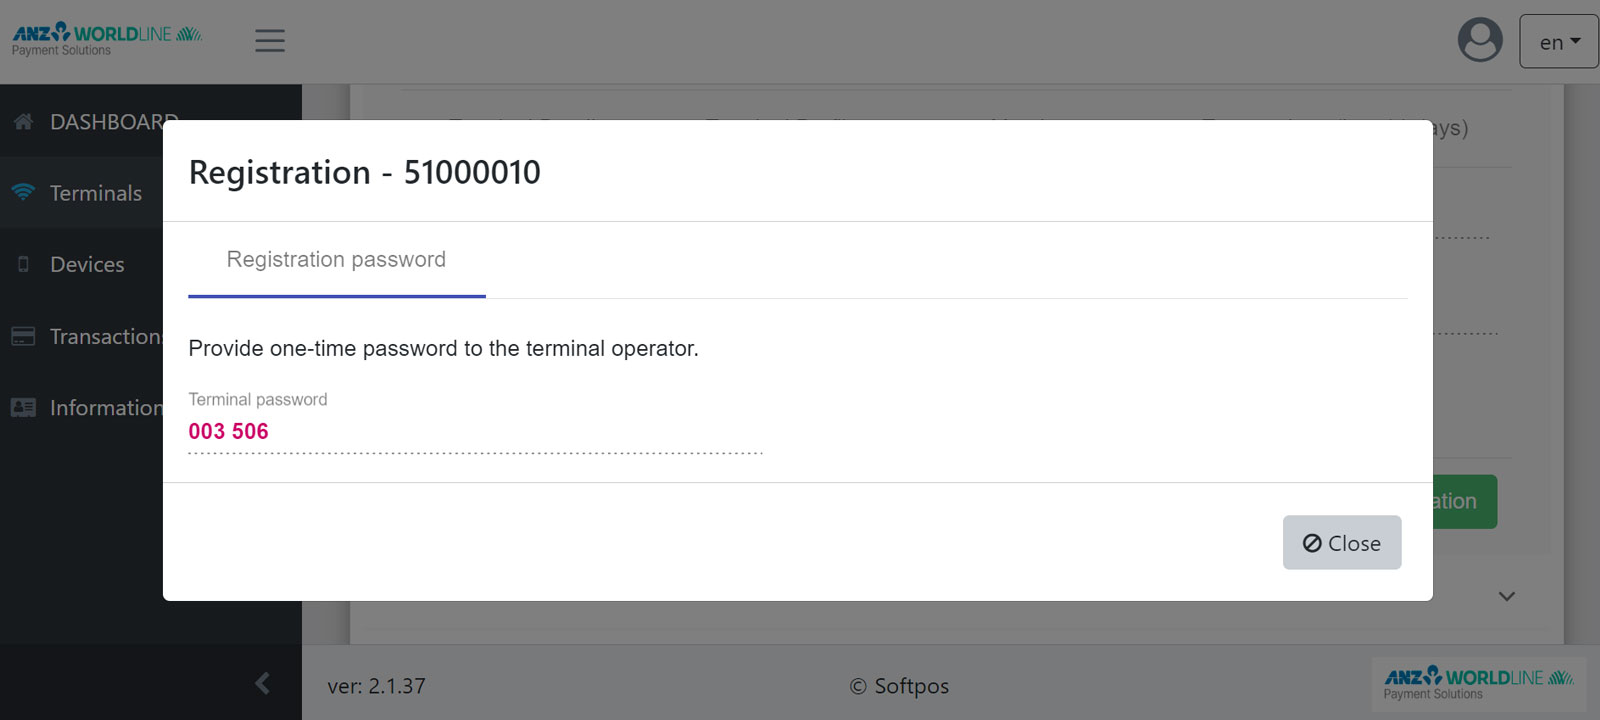
The Tap on Mobile app will ask you to register your device during installation. To do so you will need your Tap on Mobile app and access to the Online Portal.
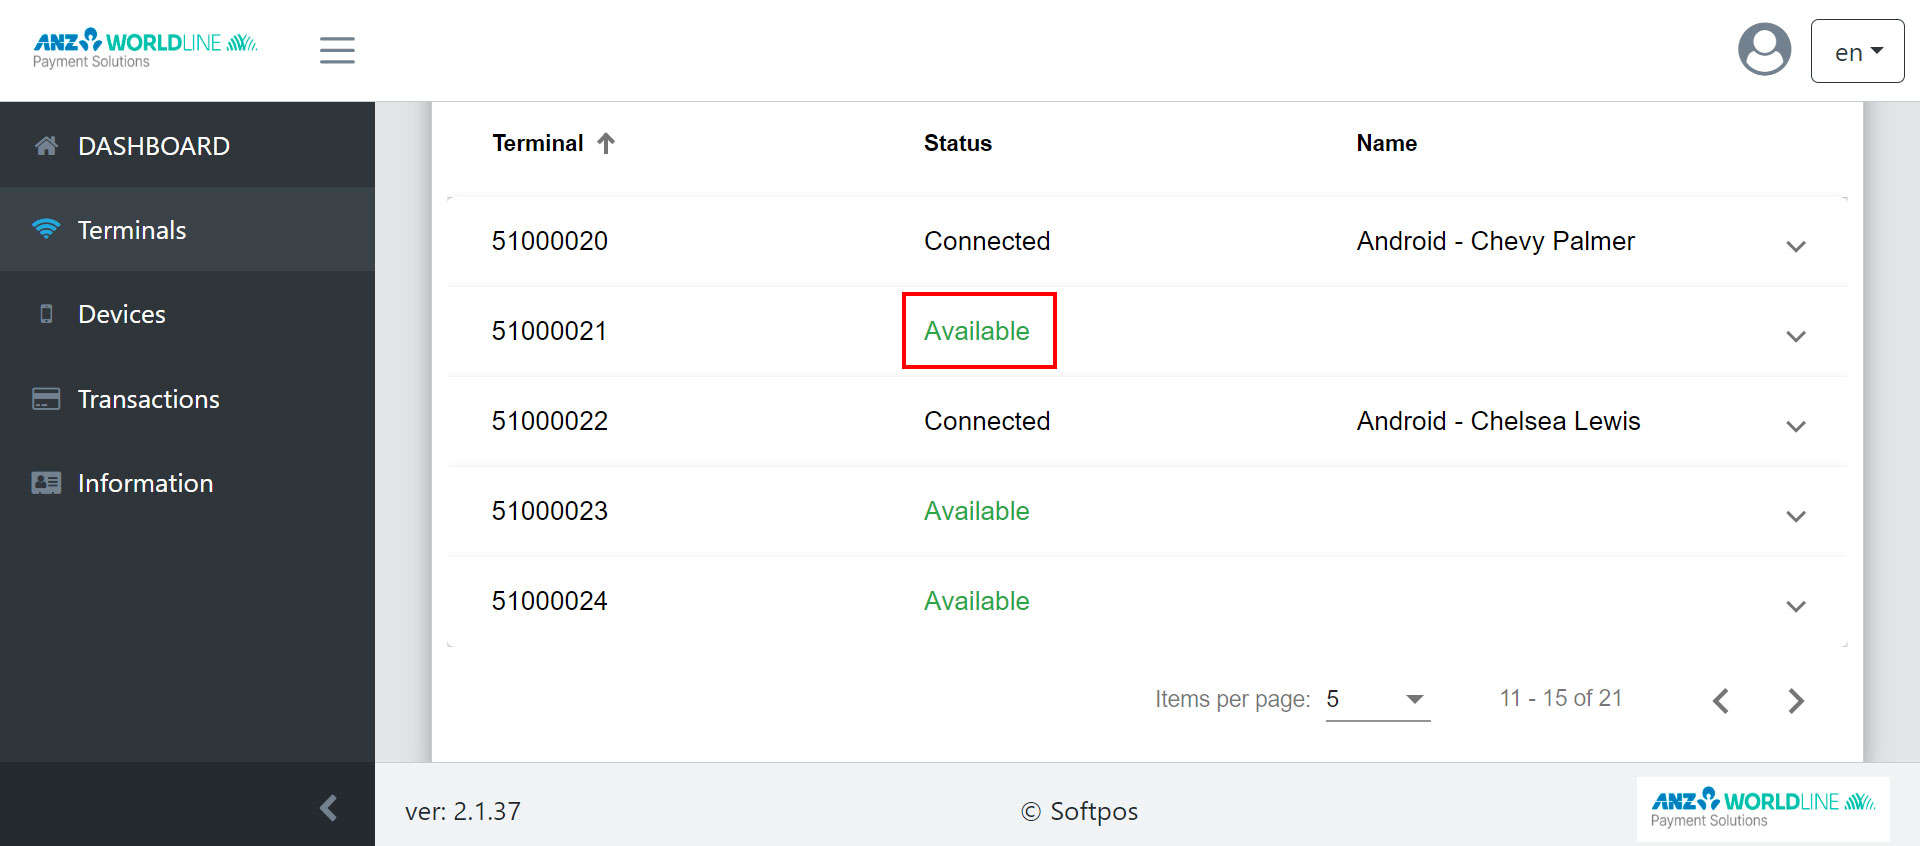


Note: It is recommended that you add the users name and device type e.g. Android or iOS, This will make it easier for you to search and manage your devices/users.
e.g. Name: Android - John ABC, or iOS - John ABC


4.
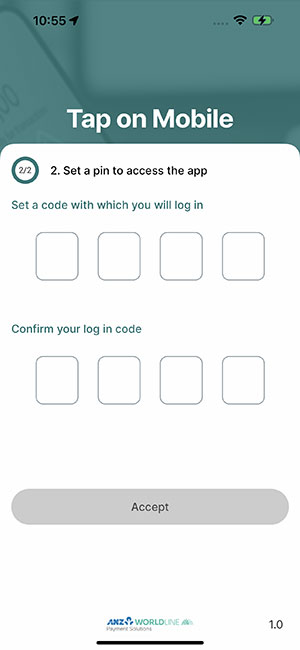
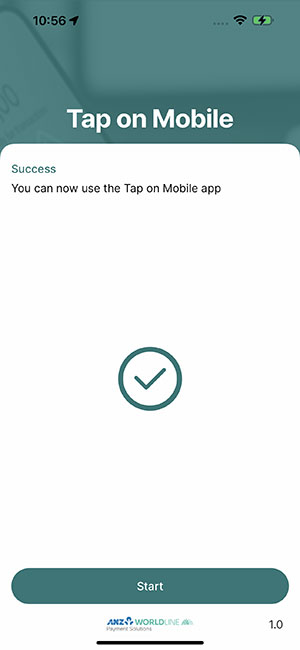
Finishing the setup of your Tap on Mobile app
Finish the app setup by setting a PIN to access the app.
5.
Adding a device/user
6.
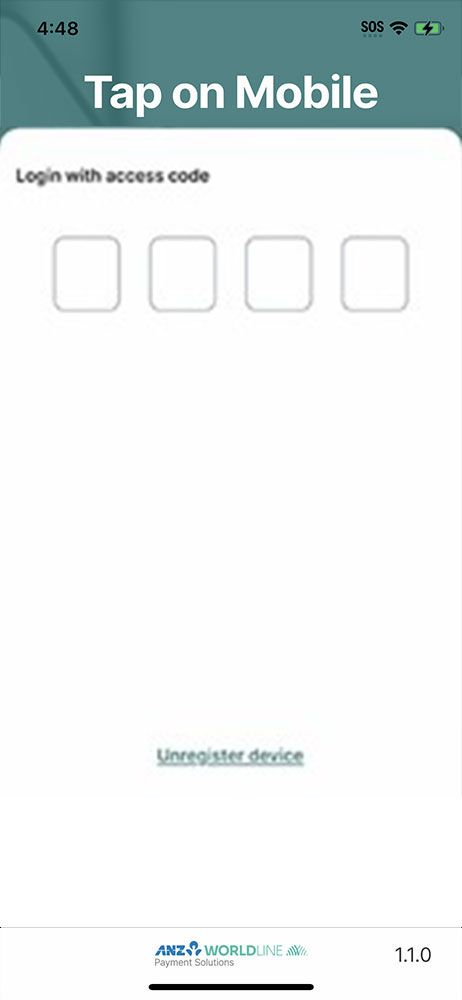
Unregister a device
8.
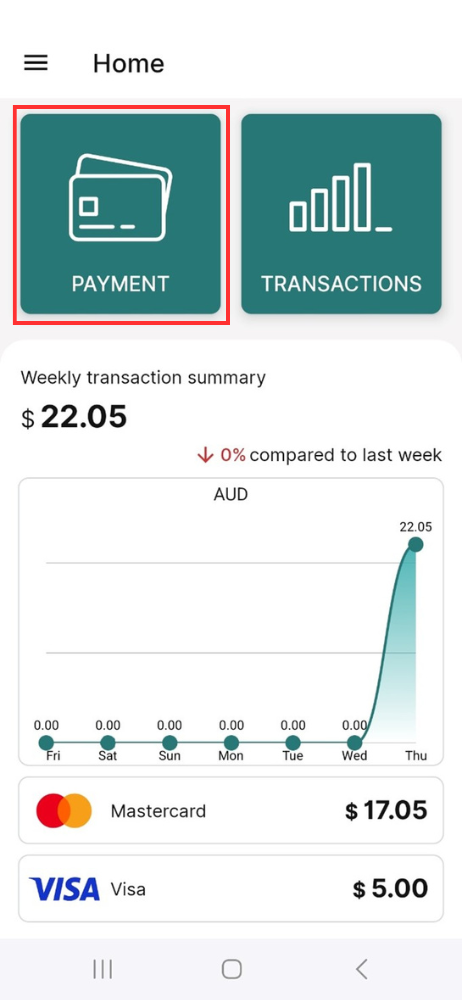
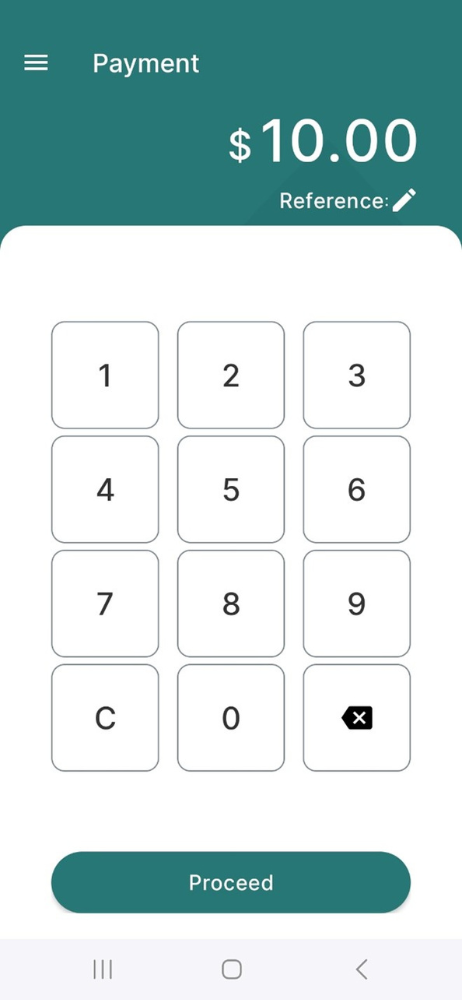
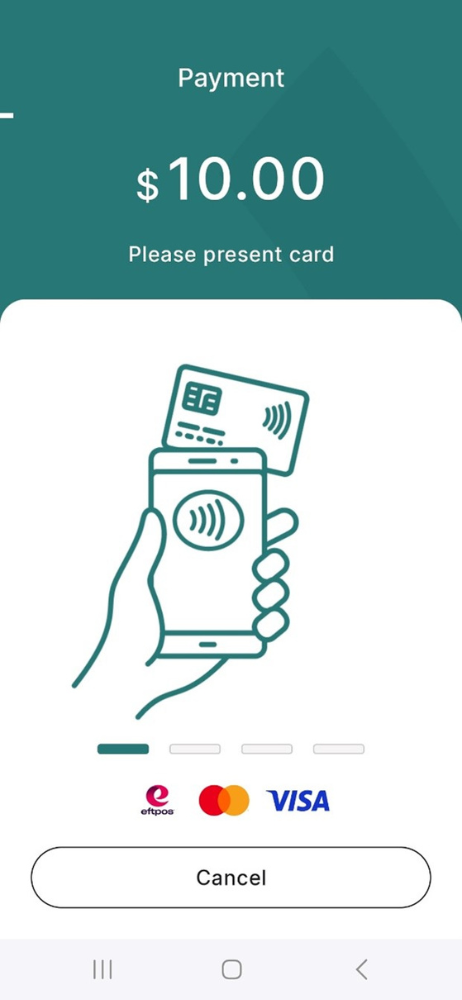
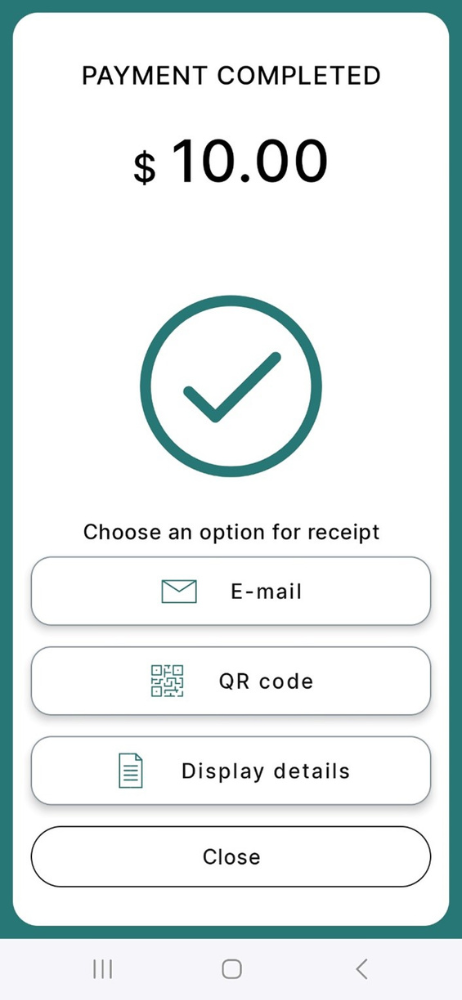
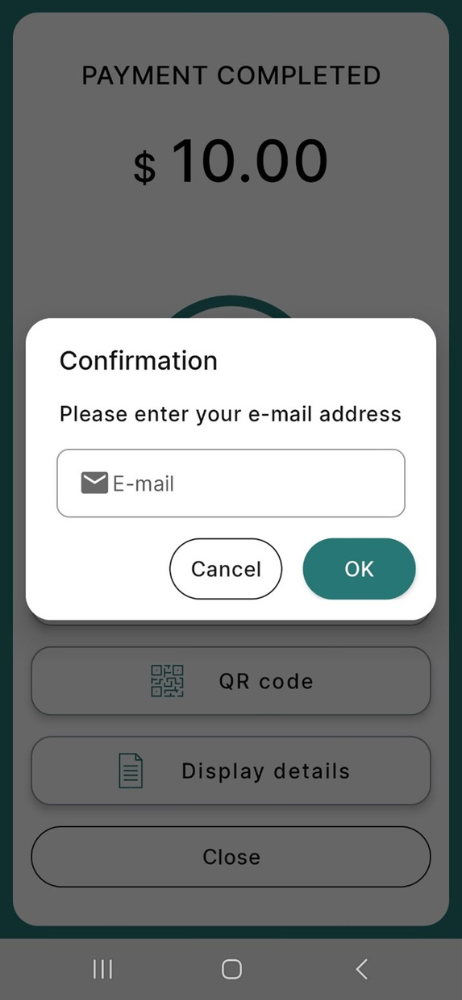
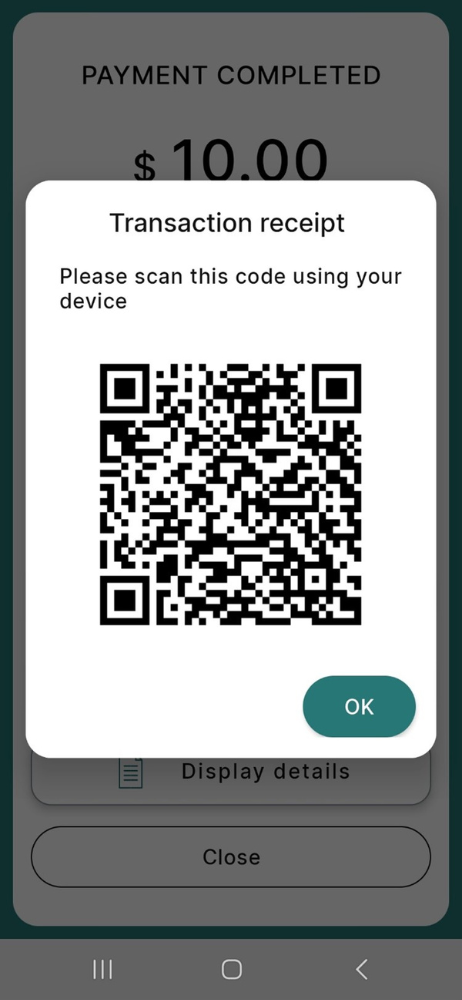
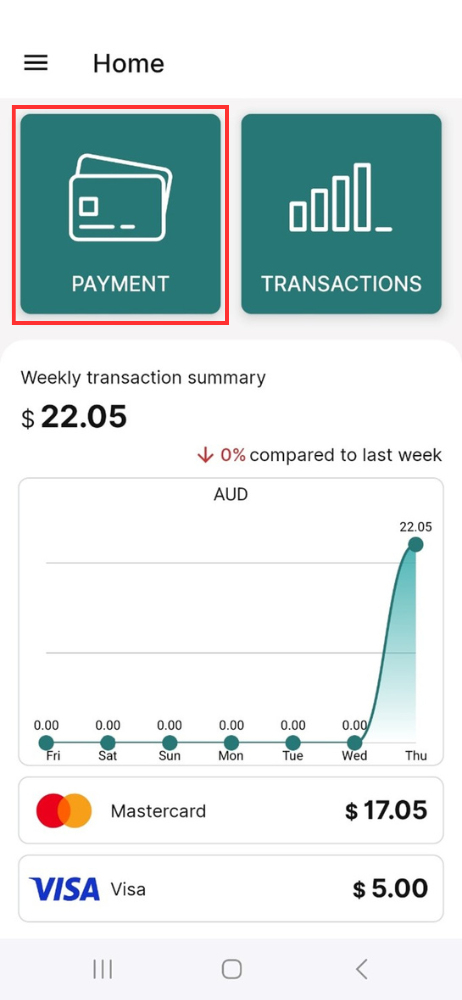
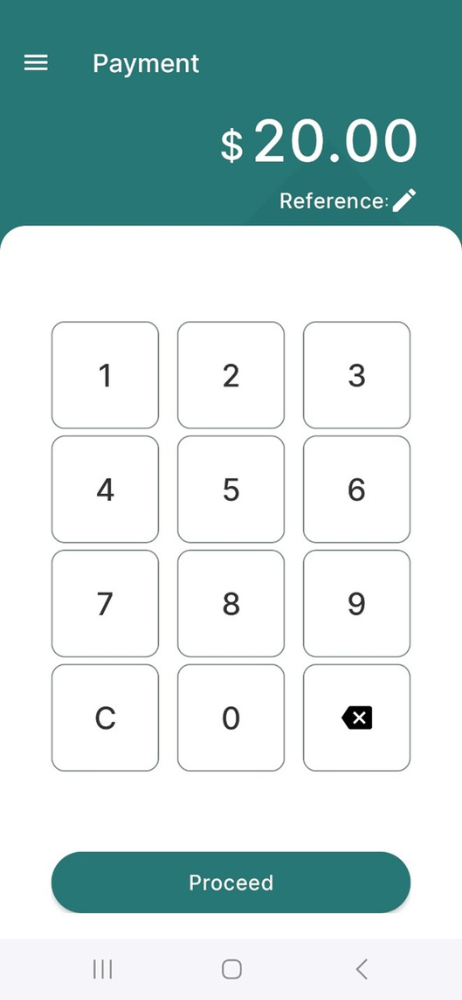
Processing a payment
8.1
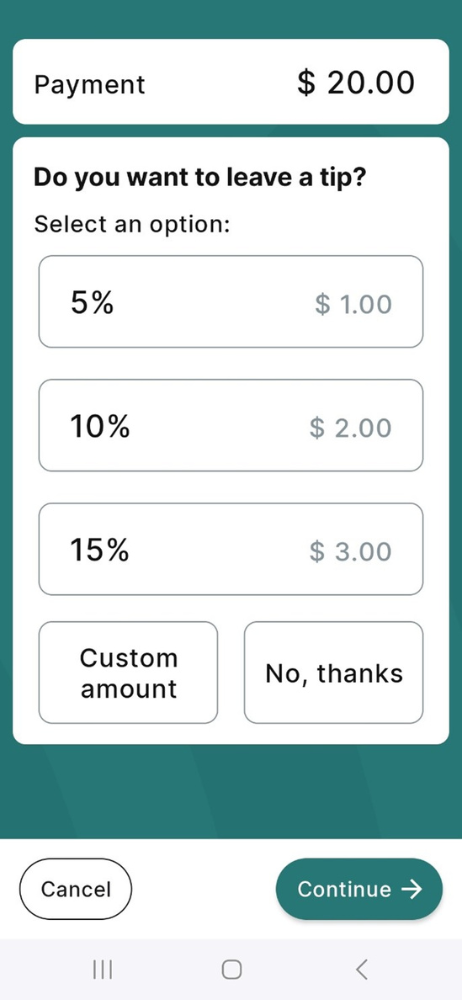
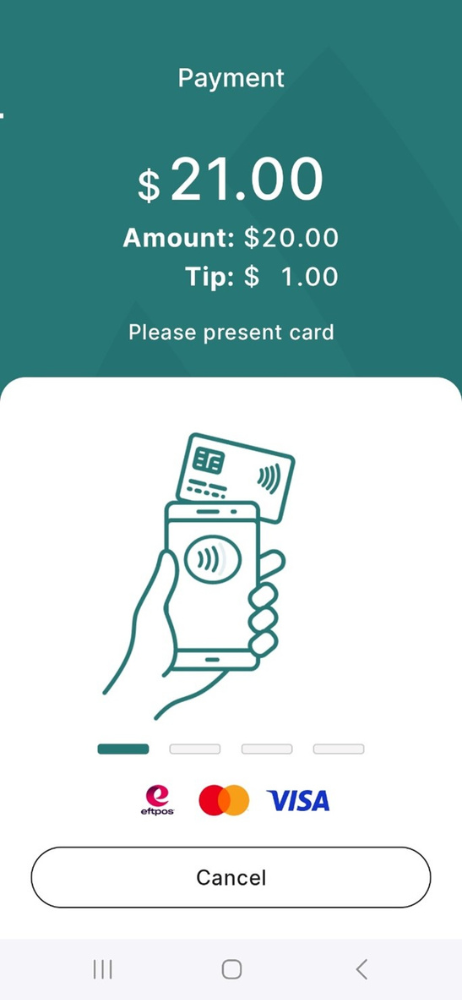
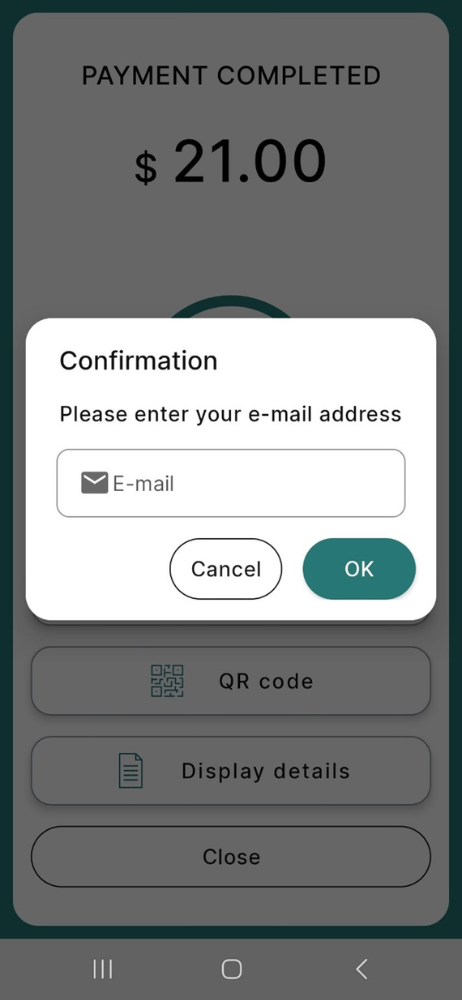
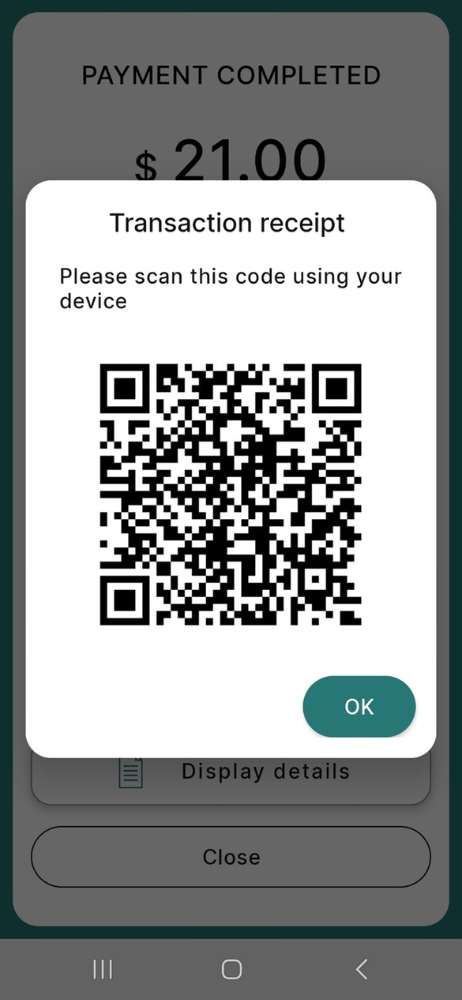
Processing a payment with tipping
9.
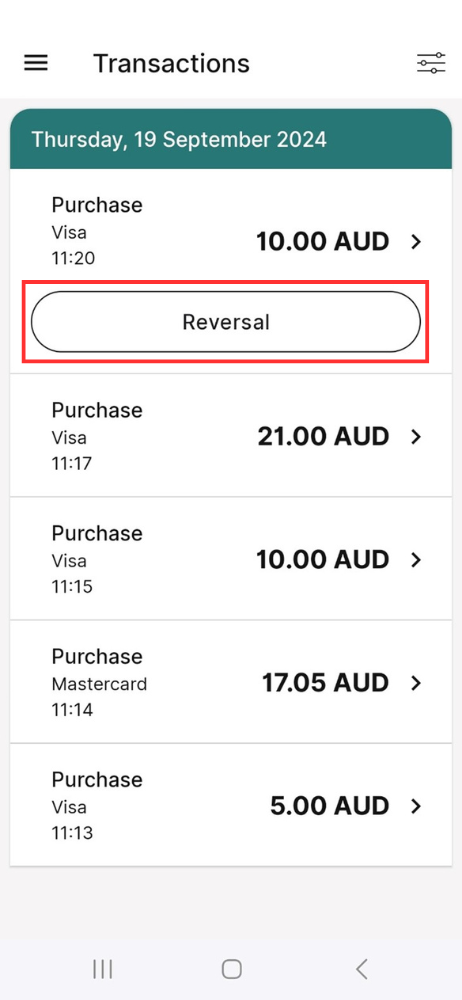
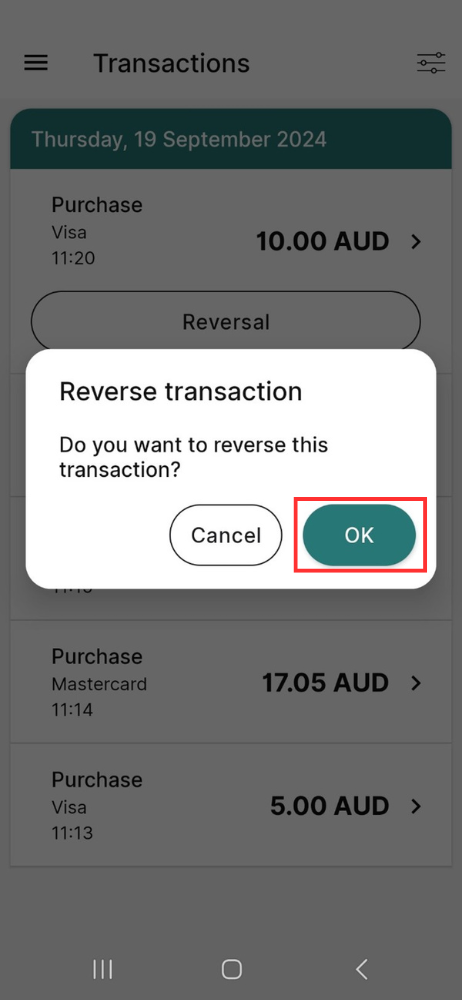
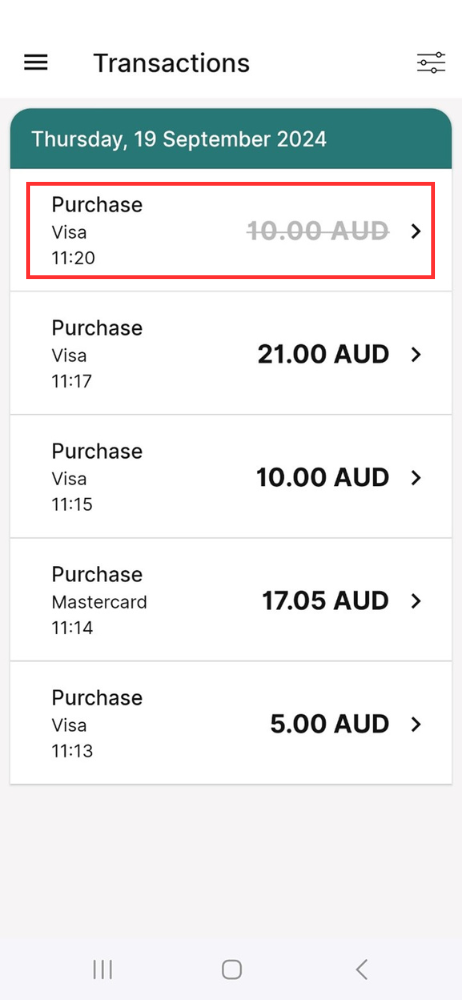
Reversing a payment
A reversal allows you to refund a transaction back to the same card that was used without needing to have the card present. Please note, you can only reverse the last transaction that was processed. If you want to reverse a transaction prior to the last one processed then you will need to process a refund.
10.
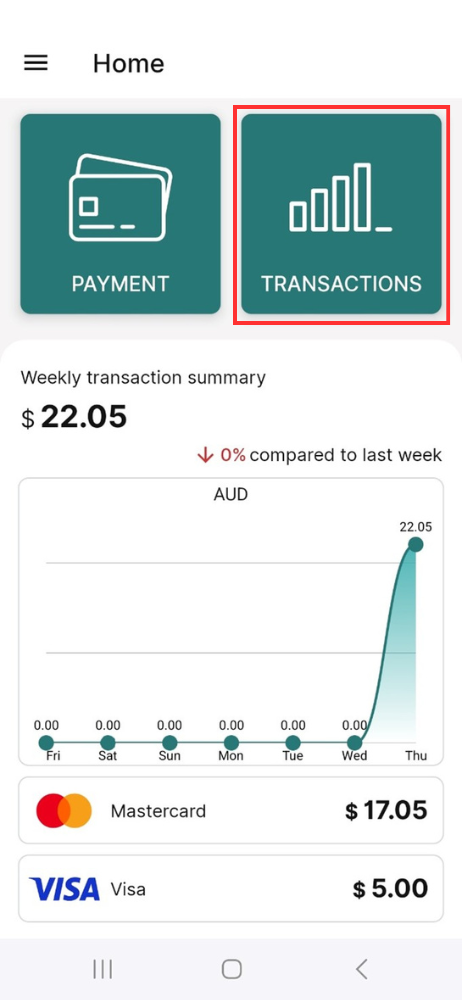
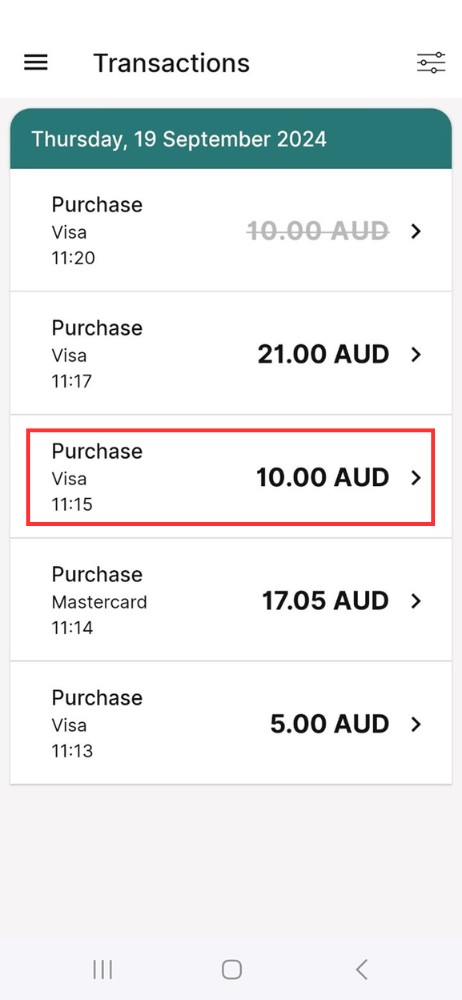
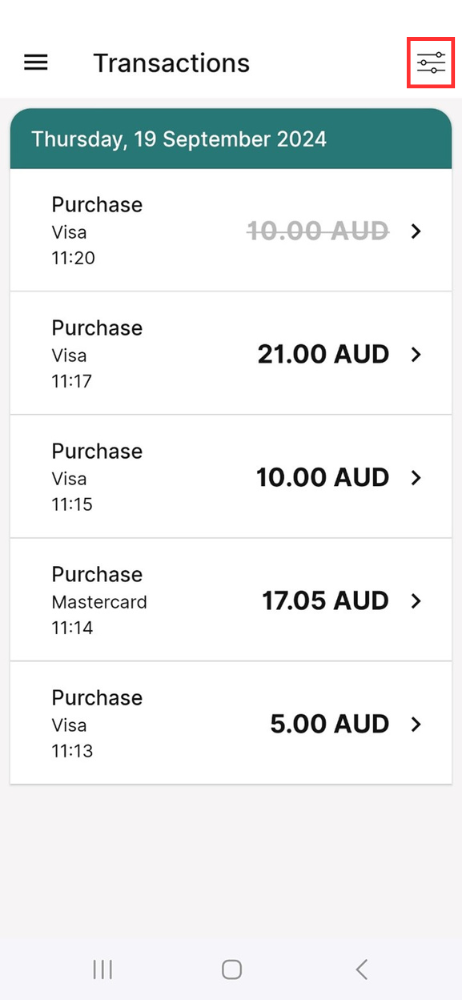
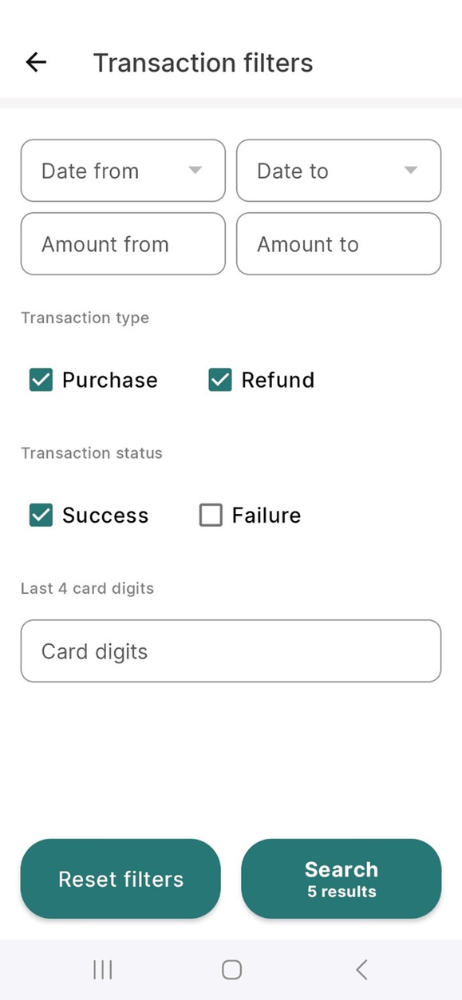
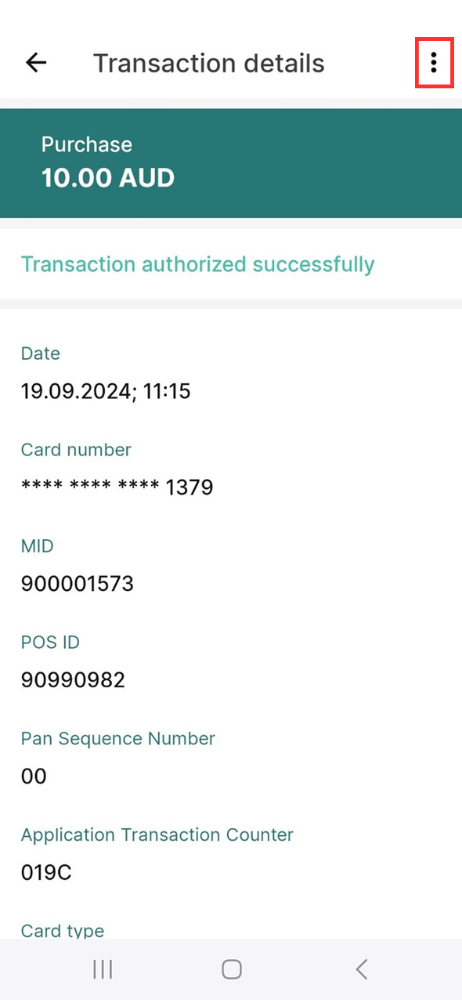
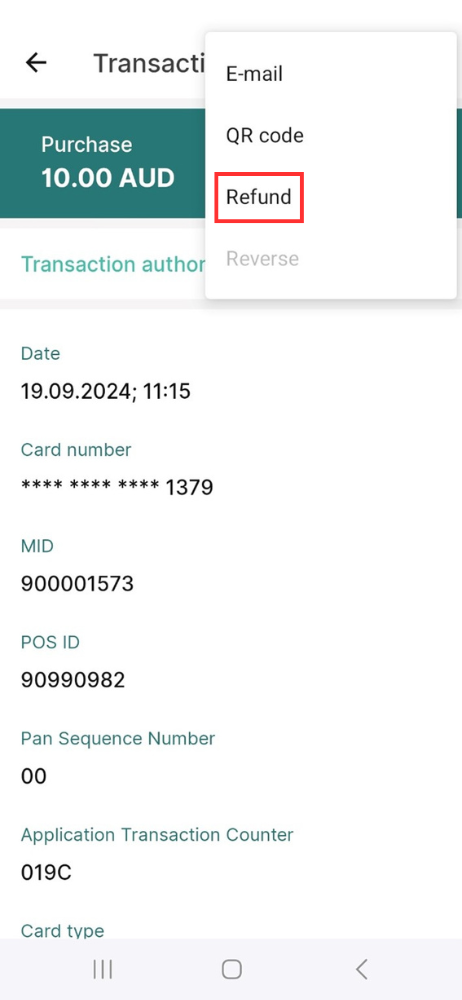
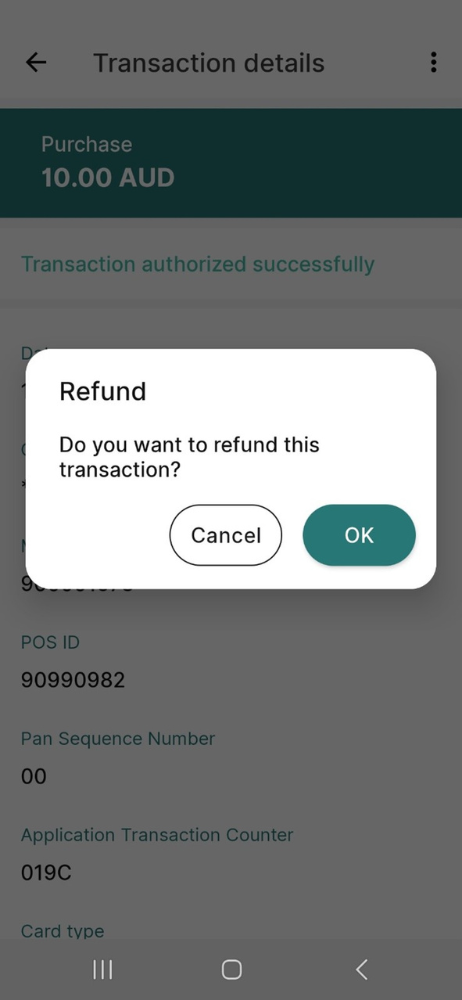
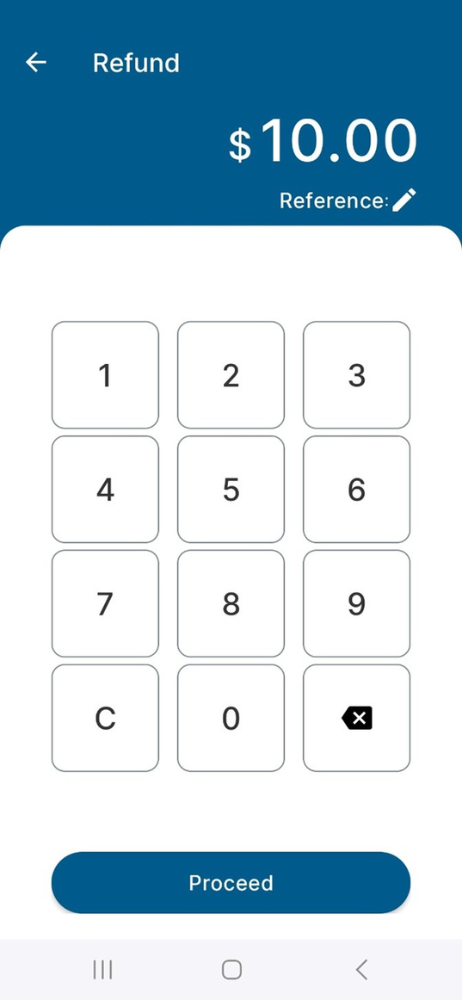
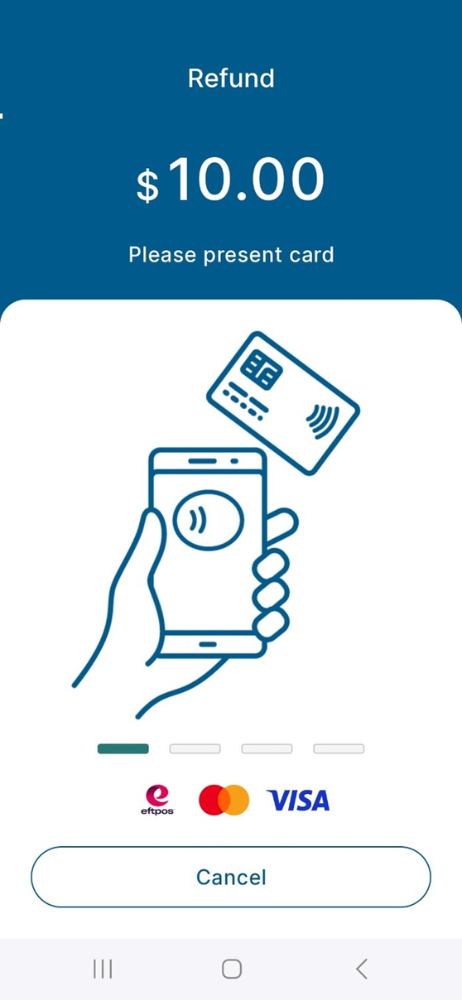
Processing a refund
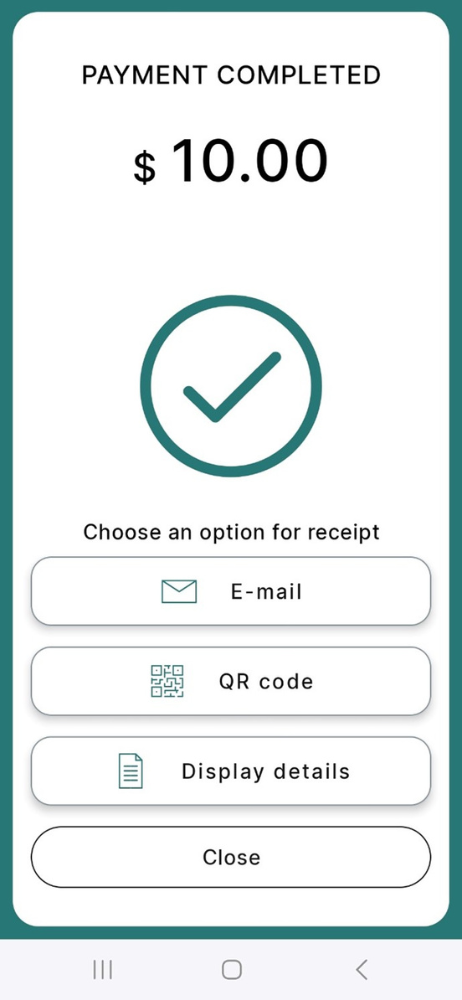
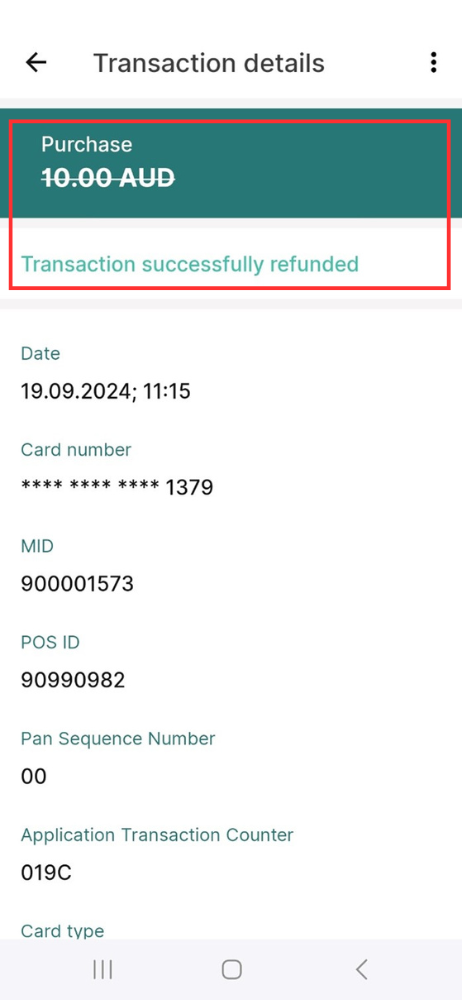
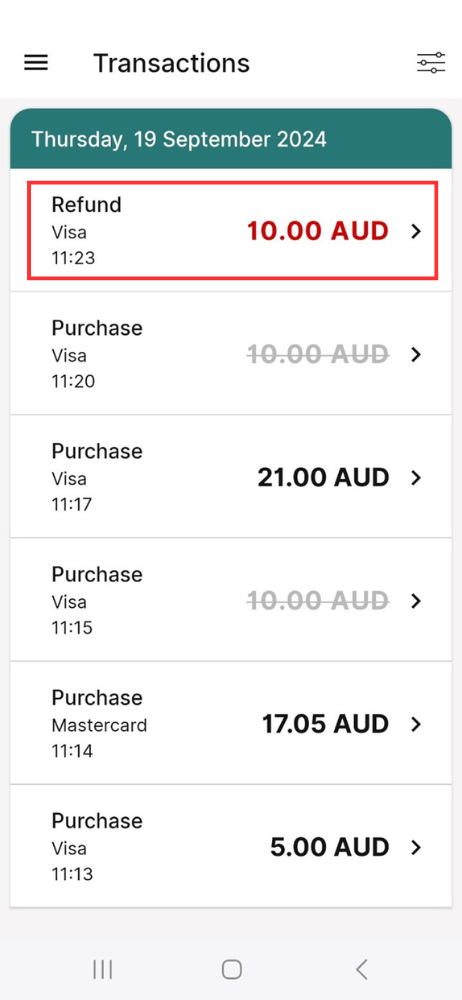
11.
Glossary
- Sale + Cleared: i.e., Purchase/Sale process was accepted and completed.
- Sale + Cancelled: i.e., Purchase/Sale process was reversed or cancelled.
- Sale + Declined: i.e., Purchase/Sale process was declined by customer before completion.
- Sale + Refunded: i.e., Purchase/Sale transaction was refunded.
- Refund + Authorised: i.e., the refund process was authorised and completed.
12.
Important notes
- The transactions will appear on the Online Portal and Merchant Portal in 'near real-time', if you still cannot see a transaction on either, please refresh the page and it should appear.
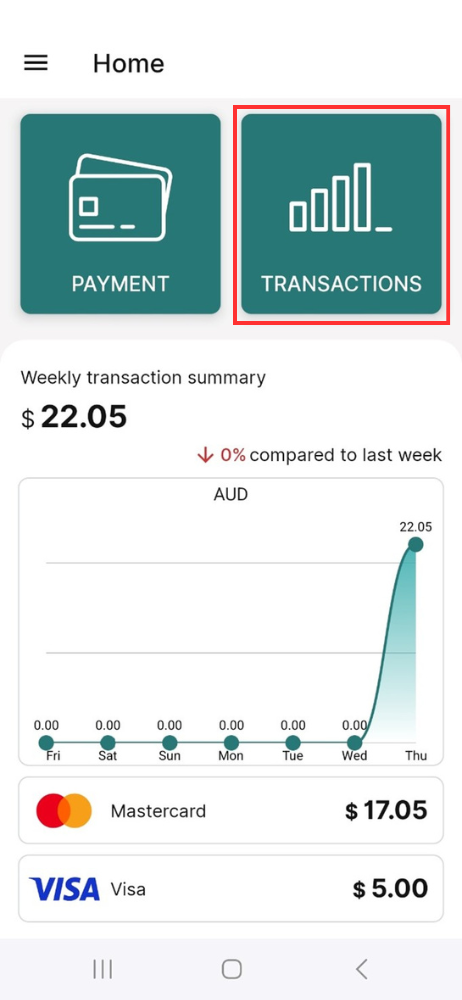
- The Tap on Mobile App graph will only display transaction data for up to 1 week.
- The Online Portal will only display transaction data for up to 1 month.
- For older transactions, please refer to your Merchant Portal, which holds information for up to 24 months.
- Please note temporary disruptions and outages for system maintenance may apply to the Online Portal.
- Limits apply to any of your customers that are using the following physical cards to complete a sales / purchase transaction:
| Scheme Limit in AUD | |
| Visa Purchase amount | >$200 |
| Mastercard Purchase amount | >$100 |
| EFTPOS Limits | Depends on the card issuing bank |
7.
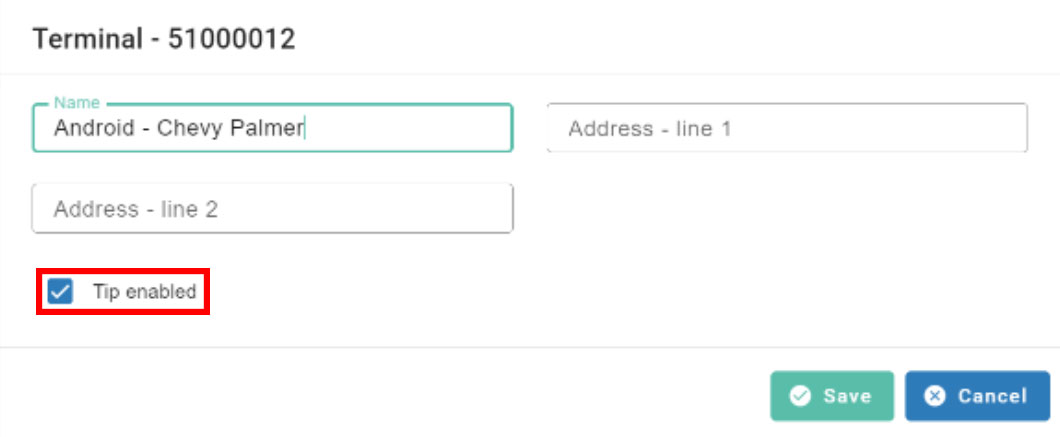
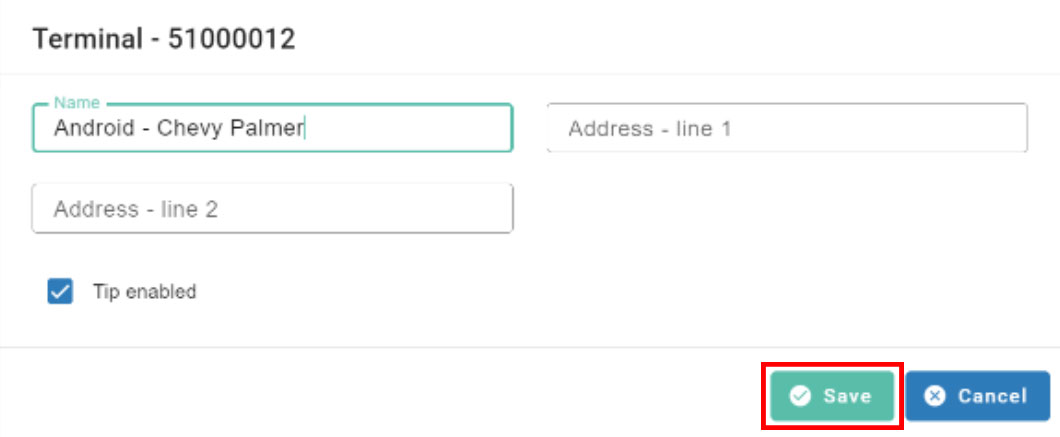
How to enable tipping for your Tap on Mobile app
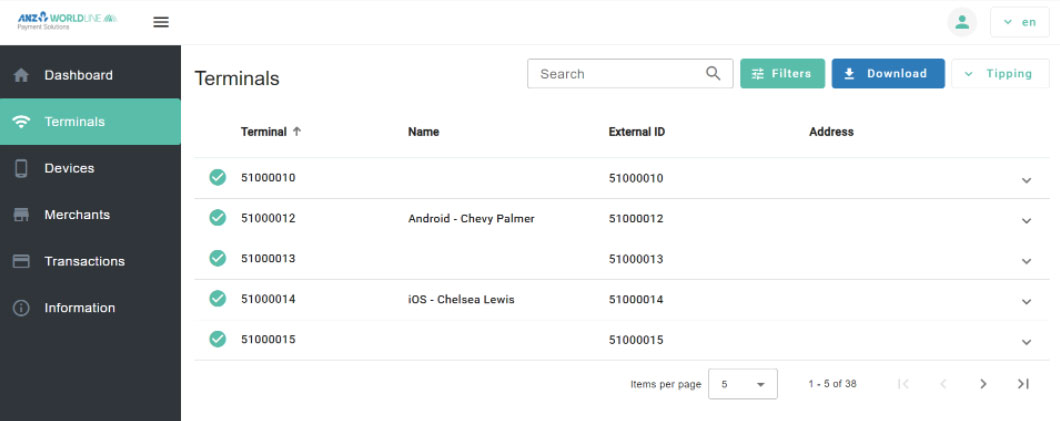
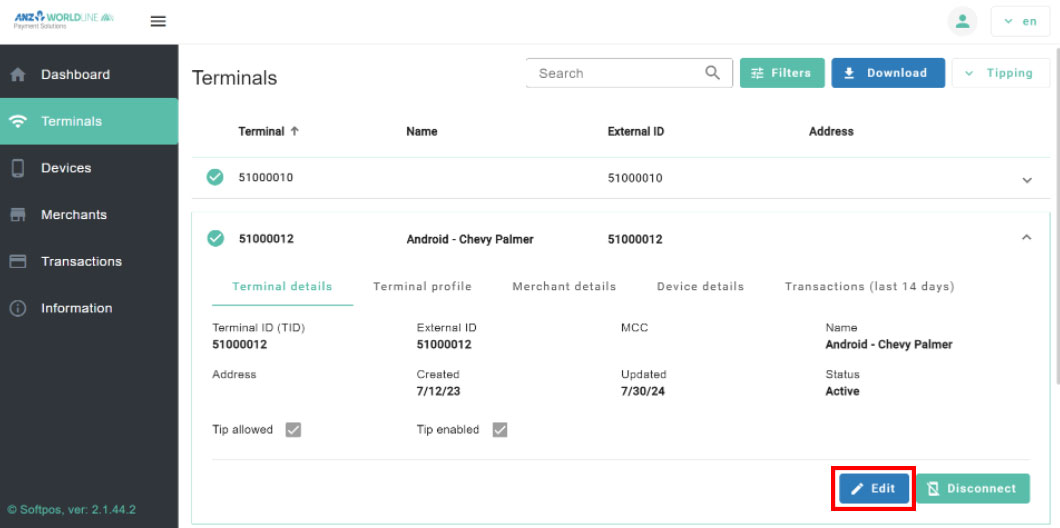
Note: If you do not see the option to select 'Tip enabled' please contact our Merchant Servicing Helpdesk on 1800 039 025 for further assistance.
